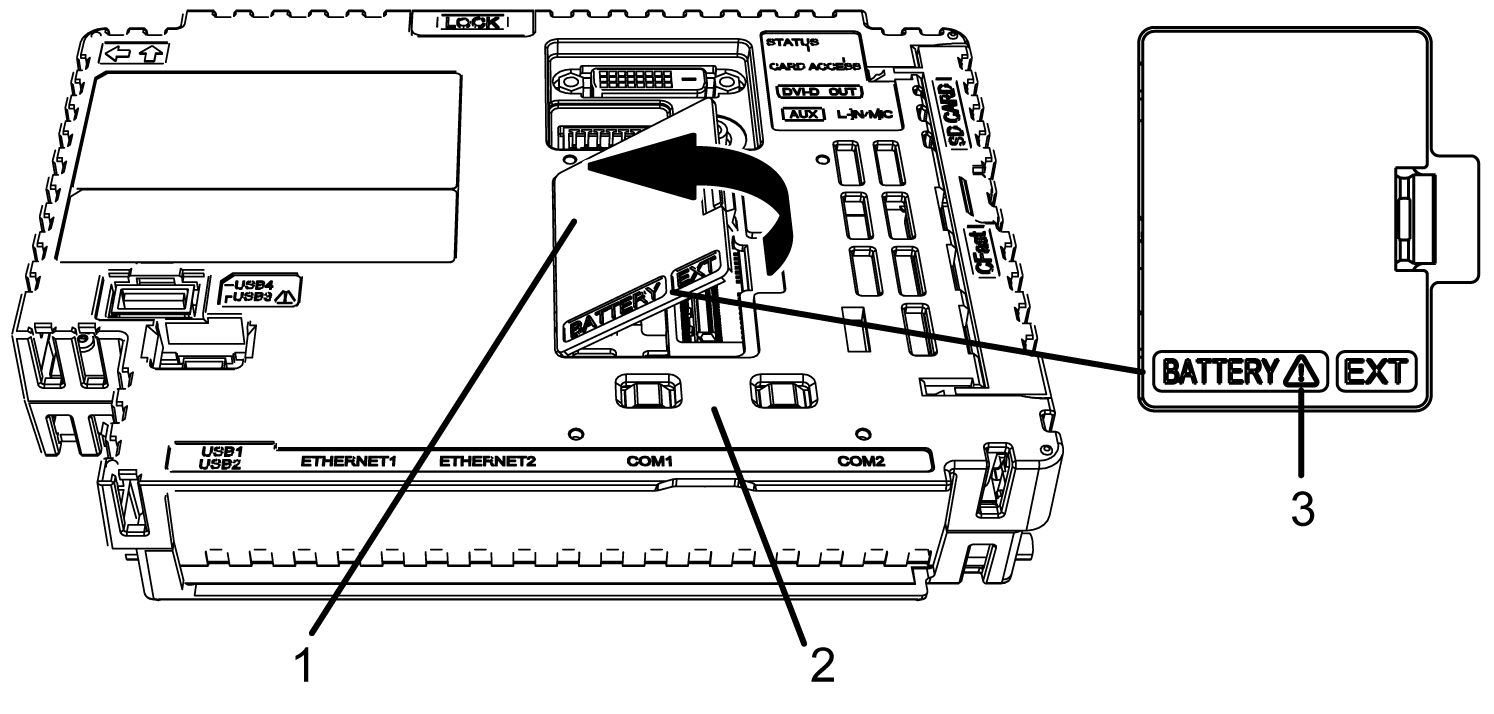
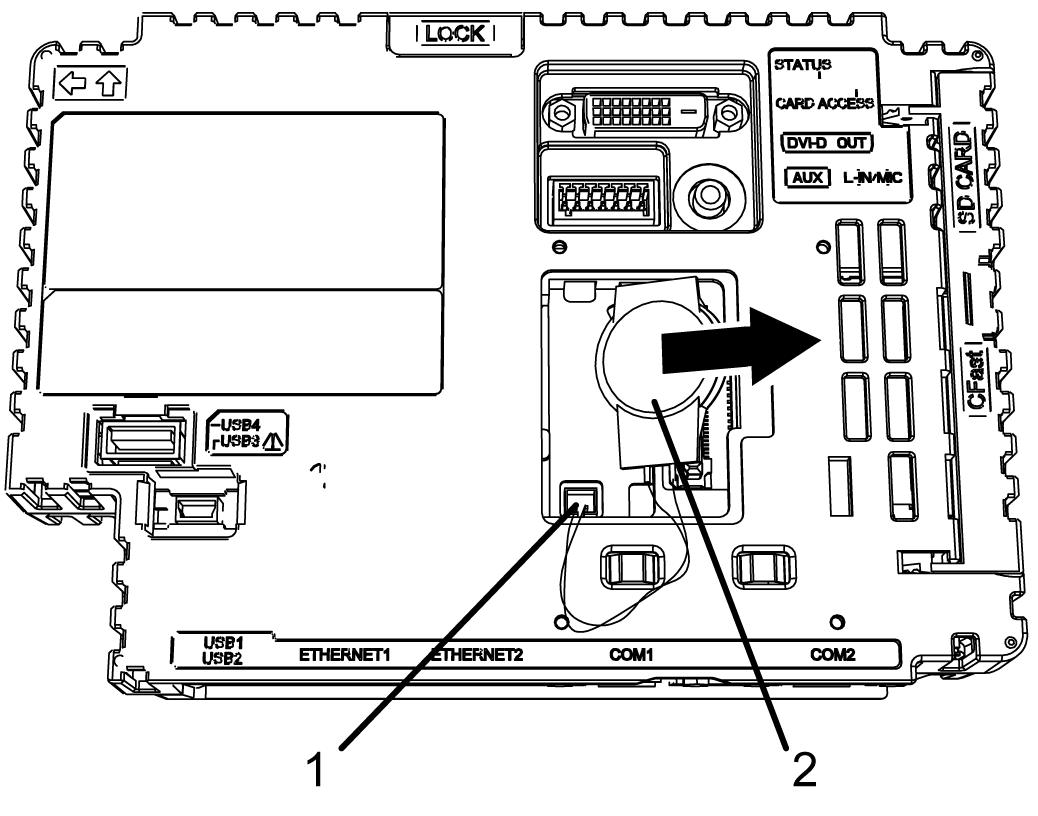
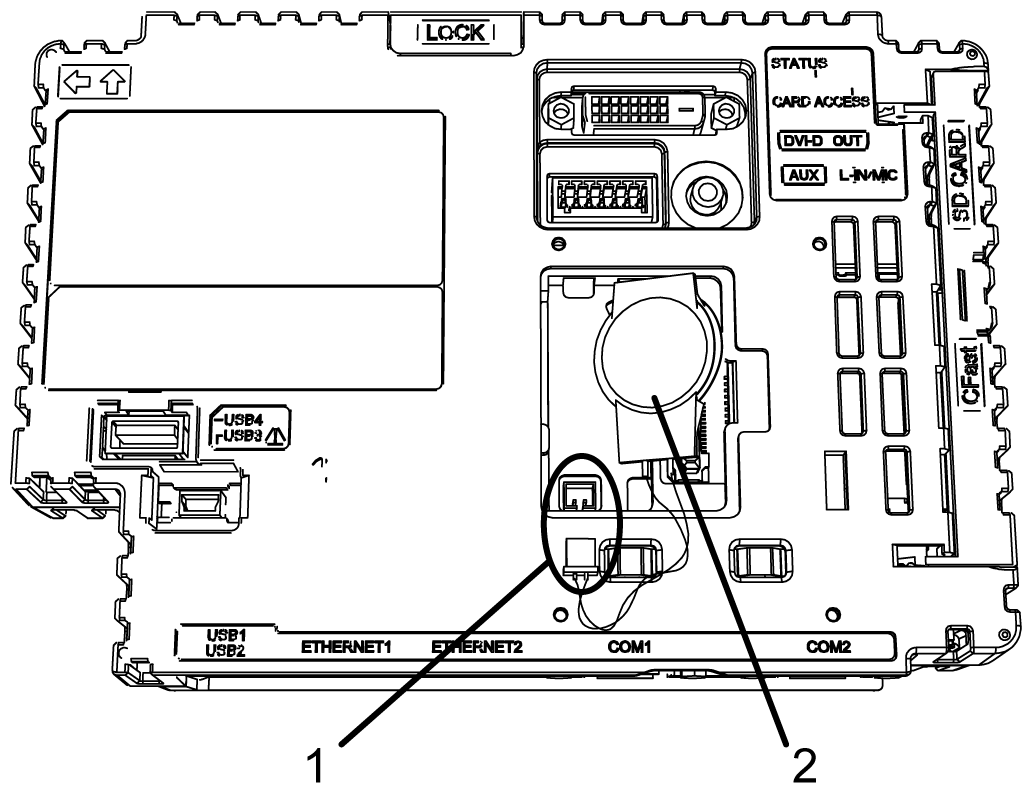
Replacing the Primary Battery
Backup clock data uses a Supercapacitor (electric double-layer capacitor) for power. When the voltage from the Supercapacitor is low, clock data is lost*1 when this product is turned OFF. The average period for backup is as follows:
Initial: approximately 100 days
After 5 years: approximately 30 days (when used with an ambient temperature of 25 °C [77 °F])
*1 On the Standard Box and the Power Box, if clock data is lost, a clock data error message appears when starting up this product. When this happens, leave this product ON for at least 5 minutes, and then set the clock again. Refer to your screen editing software manual on how to set up the clock.
By connecting the optional backup battery (Model Number PFXZCBBT1) for clock data backup, you can maintain a backup period of up to 5 years or more (when used with an ambient temperature of 25 °C [77 °F]). However, as the battery expires after 5 years, we recommend regularly changing the battery every 5 years.
-
Because the battery for clock data backup is a lithium battery, its performance degrades based on the temperature. As a result, when the battery's ambient temperature is higher, the backup period is shorter.
Battery ambient temperature 40 °C (104 °F): 5 years or more
Battery ambient temperature 50 °C (122 °F): 4.1 years or more
Battery ambient temperature 60 °C (140 °F): 1.5 years
When the voltage of the Supercapacitor drops at the same time as the voltage in the Battery for Memory Backup, clock data is lost when power is disconnected. If the clock data error message appears while the Battery for Memory Backup is connected, the Battery for Memory Backup is low and requires replacement.
 DANGER DANGER
|
|---|
|
HAZARD OF ELECTRIC SHOCK, EXPLOSION, OR ARC FLASH
Failure to follow these instructions will result in death or serious injury.
|
 DANGER DANGER
|
|---|
|
EXPLOSION, FIRE, OR CHEMICAL HAZARD
Failure to follow these instructions will result in death or serious injury.
|
| NOTICE |
|---|
|
LOSS OF DATA
Failure to follow these instructions can result in equipment damage.
|
|
Step |
Action |
|---|---|
|
1 |
Disconnect the power supply from this product. |
|
2 |
Touch the housing or ground connection to discharge any electrostatic charge from your body. |
|
3 |
Place the Box Module on a flat, level surface, with the front side pointing up. |
|
4 |
|
|
5 |
|
|
6 |
|
|
7 |
Close the Expansion Unit Interface Cover. NOTE: Make sure the cable is inserted completely
inside the enclosure. Otherwise, you can damage the cable when you
close the cover.
|
|
8 |
Reconnect the power supply to this product. NOTE: After reconnecting the power supply,
set up the clock again. Refer to your screen editing software manual
on how to set up the clock.
|