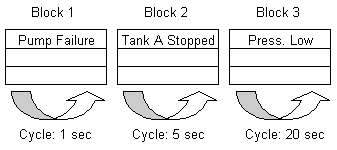
| The Polling Frequency feature allows you to set a polling cycle time to read the
alarms in each block. With this feature, you can reduce the load on a display unit by setting a longer polling cycle in each
block with lots of registered messages. Also, alarm data sorted into blocks can be processed efficiently by setting polling
cycle times according to the level of importance. |
| |
|
| |
| NOTE |
| - |
Polling frequencies don't need to be different. You can set the same cycle time in all of
the blocks. |
| - |
If a failure occurs reading an address due to a communication error, it will be read during
the following polling cycle. |
| - |
Alarms are not read immediately after the display unit starts up. They are read in accordance
with the polling cycle set in each block.
For example, if the polling frequency of Block 1 is set to 30 minutes, monitoring addresses are checked 30 minutes after
the display unit first starts up. Alarm messages cannot be checked on the display unit until then. |
|
|
| |
| ■ Setup Procedure |
| 1. |
Select [Alarm] in the [Common Settings] menu. |
|
|
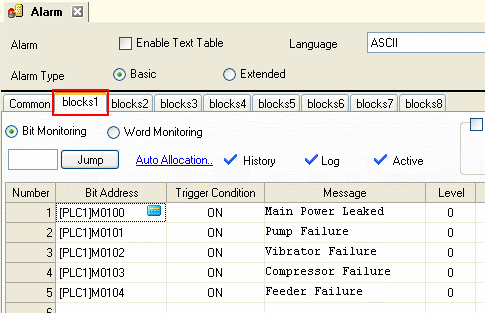
| 2. |
The [Alarm] setting screen will open. Select the block where you have registered messages.
(e.g.: blocks1) |
|
 |
|
|
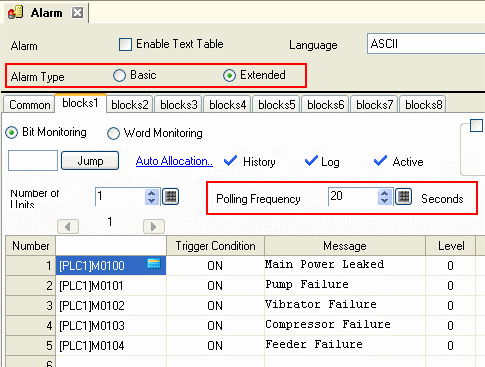
| 3. |
Set the [Alarm Type] to "Extended". The input field of [Polling Frequency] appears, and then set the polling frequency
for this block. |
|
 |
|
|
|
|
|
|
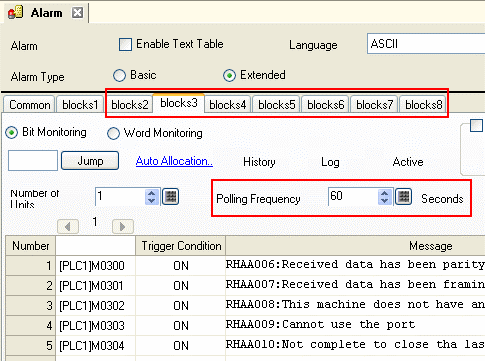
| 4. |
The polling frequency can be set in each block. |
|
 |