Products
Download
Contact us
Back to Top

 FAQ

 Configuration to avoid LAN (Ethernet) errors and USB errors in the PL-6920/7920 series


In the PL-6920/7920 series installed Windows OS, if a LAN device recognition error, a LAN communication error or a USB device error occurs, confirm the following settings.

BIOS Settings
■ Device Manager Settings

 Important
Please note that this coniguration does not apply to the PL-x930 series that is the replacement model of the PL-6920/7920 series.
 
■ BIOS Settings
 
1. Connect a keyboard to a PL-x920 unit.
2. Turn on the PL-x920 unit.
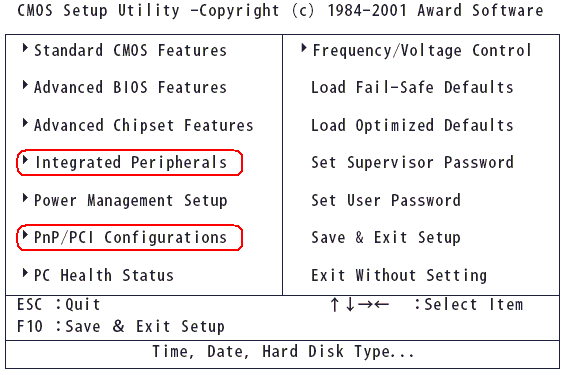
3. When the message, "Press <DEL> to Enter SETUP," is displayed at the bottom left of the screen, hold down the [DEL] key. The Setup Utility starts running, and the following menu screen is displayed.


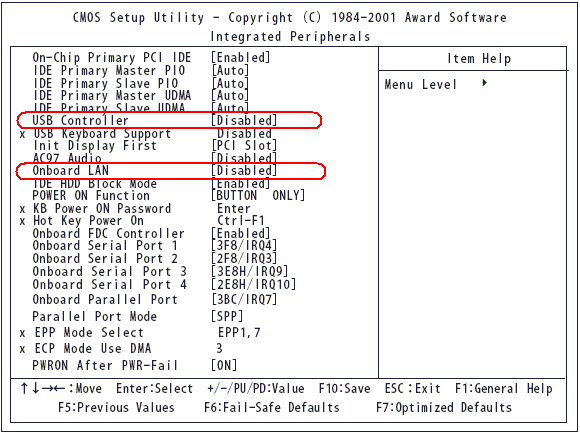
4. Select "Integrated Peripherals", and press the [Enter] key.
 

5. Select [Enabled] for "USB Controller" and "Onboard LAN."
 
 MEMO
- The factory default setting is [Disabled]. It is a correct setting even if [Disabled] is selected for the USB Controller when the OS in use is one that does not support USB interfaces, such as Windows NT 4.0.
- Use the +/- key or the Page Up/Page Down key to change the setting parameters.

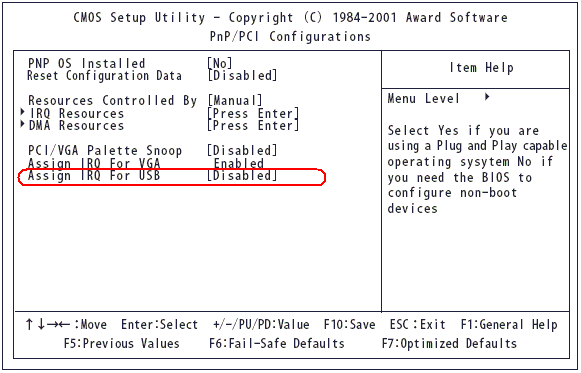
6. Press the [Esc] key to return to the screen of 3. Select "PnP/PCI Configurations" and then press the [Enter] key.
 

7. Select [Enabled] for "Assign IRQ For USB."
8.

Press the [F10] key. Select [ Yes ] in [Save configuration changes and exit now?] to save the configuration and restart the PL-x920 unit.

 
■ Device Manager Settings

 MEMO
- This configuration is unnecesary for Windows NT 4.0.

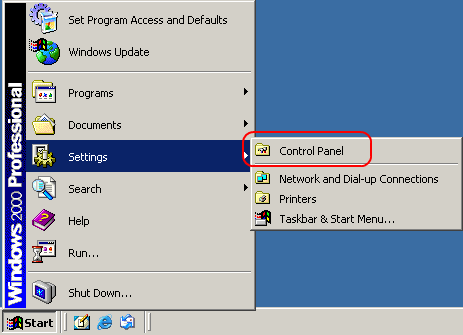
1. Open the Control Panel.
 

2. Click on the icon of "System."
 

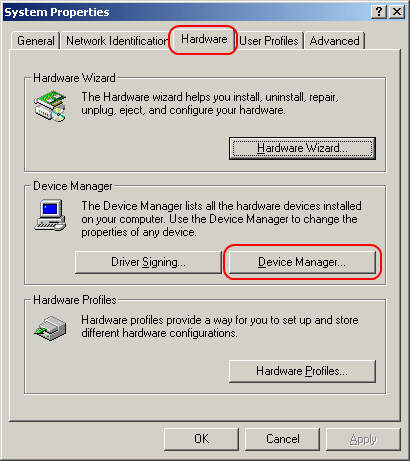
3. Click on the [Device Manager] button in the tab of "Hardware."
 

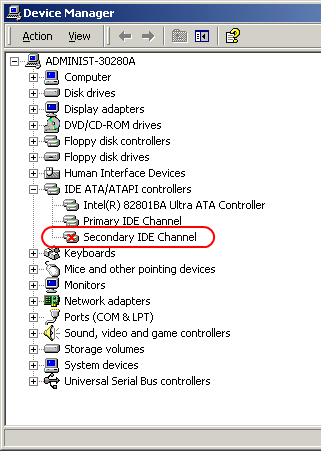
4. If the state is normal, the × mark is seen on the icon of "Secondary IDE Channel" as shown below.
 

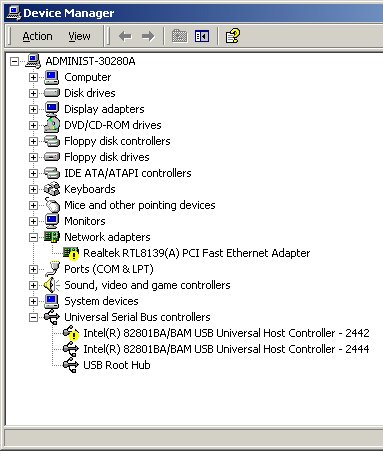
  If the × mark is not seen on the icon of "Secondary IDE Channel" as shown below, the configuration change should be done according to the procedure from 5.
 

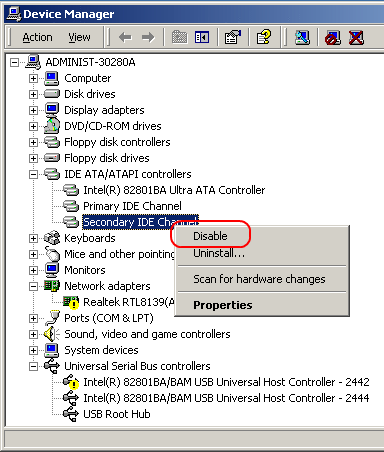
5. Right-click on the "Secondary IDE Channel" and select "Disable."
 

6. Select "Yes" when the following message box appears.
 

7.

After the following window is displayed, click "Yes" to restart Windows OS, and then the change of hardware settings has been completed.


Back to page top Return to the previous page
FAQ for use | Protection of Personal Information | Trademark Acknowledgments | About Intellectual Property Rights | Terms of Use
Copyright (C) 2005- Schneider Electric Japan Holdings Ltd. All Rights Reserved.