|
|
| Precautions for loading a part with "L Tag (Library Display)" |
|
If you call a part from another screen using GP-PRO/PB3's [L Tag (Library Display)], you can load the picture of the part even though the part's features cannot be loaded.
GP-Pro EX's [Picture Display] is the alternative for [L Tag], however, if you call a [Picture Display] from another screen, even the picture will not be loaded.
The followings explain how GP-PRO/PB3 displays.
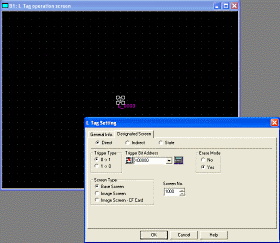
| Example of settings on GP-PRO/PB3 |
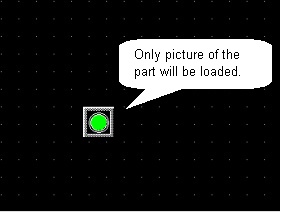
An [L Tag] is placed on B1 and a [Lamp] part is placed on B1000.
The part on B1000 is loaded to B1 using the L tag.
|
| B1 |
| An [L Tag] is placed on the center of the screen. |
|
|
|
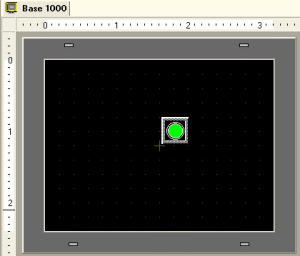
| B1000 |
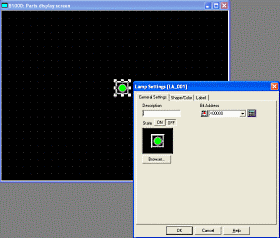
| A [Lamp] part is placed on the center of the screen. |
|
|
|
When setting as above, GP shows the picture of the Lamp part when the trigger bit of the L Tag turns on.
|
| GP Screen when the bit is OFF |
|
|
|
|
| GP Screen when the bit is ON |
|
|
|
|
| GP-Pro EX's performance and precautions |
Convert the data to GP-Pro EX. The picture of the Lamp will not appear even if you turn on the trigger bit of the [Picture Display], which is the part for an L Tag after conversion, without changing settings.
To display it on GP-Pro EX, replace the Lamp part with a picture.
This section introduces you how to import a bitmap data as a picture of a switch.
|
| How to replace a part to a draw with GP-Pro EX |
| 1. |
Open the GP-Pro EX screen on which a part is placed. |
|
 |
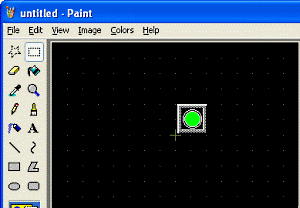
| 2. |
To make a bitmap file, copy it to any paint application by using the print screen feature of the PC. |
|
 |
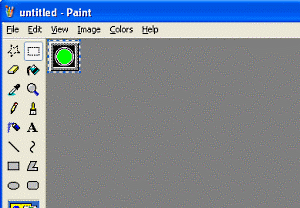
| 3. |
Cut the “Lamp” part from the image and save it as a bitmap file. (The data types that GP-Pro EX can load are as follows; *.bmp, *.jpeg, *.jpg, *.jpe, *.jfif, *.dpd)
We recommend you to keep its size to the same as the part. |
|
 |
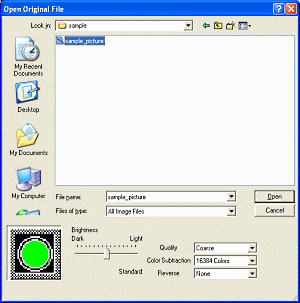
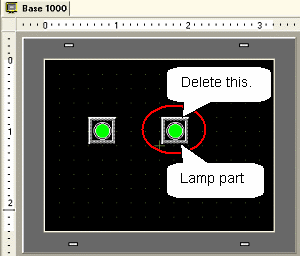
| 4. |
Delete the part on GP-Pro EX and place the image file instead. To place the image data, select the [Draw] menu → [Image Placement]. Select the image data and click the [Open] button to upload the image data. |
|
 |
| 5. |
Delete the “Lamp” part placed already on the screen and re-place the uploaded image on the position of the Lamp. |
|
 |
| 6. |
It looks the same as before. |
|
|
|
|