|
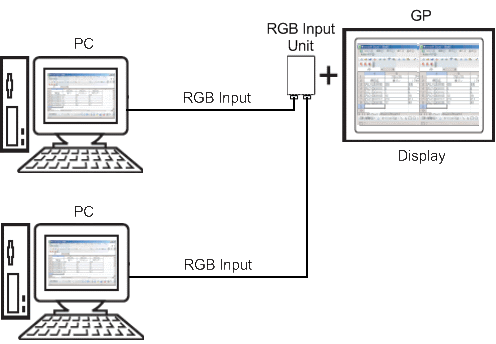
By installing an "RGB Input Unit" (an optional product) to a GP unit, you can display images outputted from 2 PCs (supporting analog RGB only) onto one GP unit simultaneously. Also you can use a GP unit as a PC monitor. |
|
|
|
|
* |
Setup Procedure
|
| |
1. |
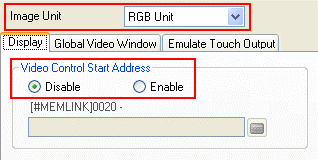
In the [System Settings] window, select [Image Unit].
|
| |
2. |
Set the [Image Unit] to "RGB Unit" and
select "Disable" in the Video Control Start Address setting. |
|
|
|
|
|
| NOTE |
| * |
If the [Video Control Start Address] is set to [Enable], 13 words from the specified control address are
automatically used to control the video display.
For the items in the video control, see About Video Control Area. |
|
|
|
3.
|
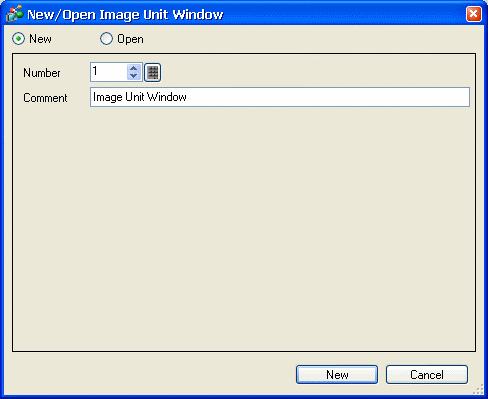
Select [Image Unit Window (U)] from the [Common Settings (R)] menu or click  to
open the following dialog box.
Select [New] and set the [Number] and the [Comment].
(e.g.: Number "1", Comment "Image Unit Window") |
|
|
|
|
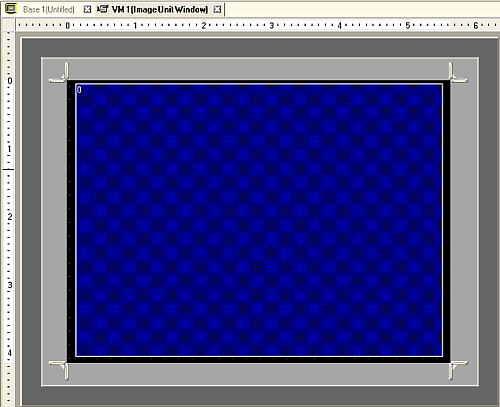
4.
|
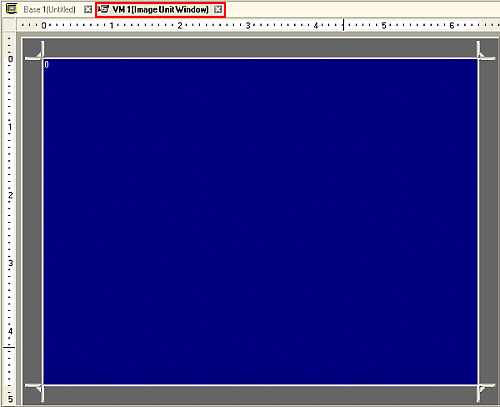
A video screen (VM1) will be displayed.
|
|
|
|
|
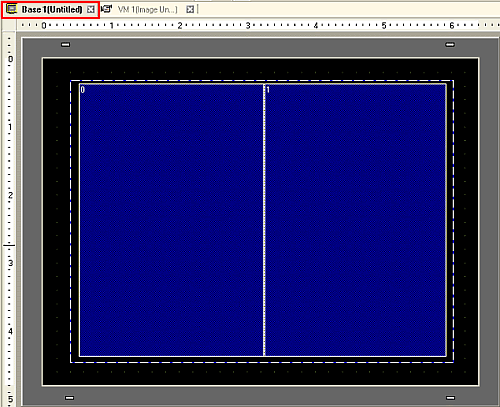
5.
|
Adjust the size of the [Image Unit Window].
If you want to make it smaller, reduce the size of the image display area (the blue part) first, and then adjust the size
of the Image Unit Window by dragging the  on
the corners. If you want to make it bigger, increase the size of the Image Unit Window, and then adjust the image display
area. |
|
|
|
|
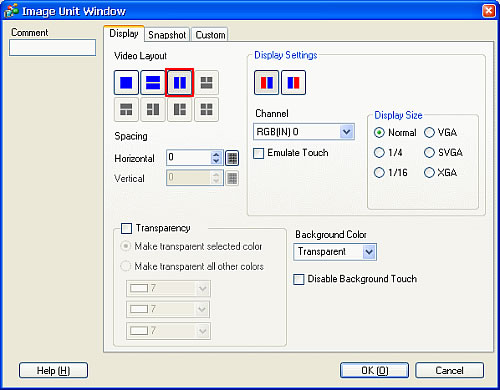
6.
|
Double click the image display area (the blue part) to open the following dialog box.
Select  for the [Video Layout]. |
|
|
|
|
7.
|
Set the [Display Size].
(If you select [Normal], the image will be displayed with the same size as inputted.)
|
|
|
| NOTE |
| * |
If the selected [Display Size] is larger than the display unit or the image display area (the blue part),
the entire image will not display.
You can use the [Video Display position setting] on the [Custom] tab to specify which
part of the input image to be displayed. To display the entire image, set the [Display Size] smaller than the size of the
image display area (the blue part). |
|
|
|
8.
|
Click [OK] to finish the [Image Unit Window] settings.
|
|
9.
|
Open the [Base 1].
Select [Image Unit Display (V)] from the [Parts (P)] menu or click  to place an [Image Unit Display]. |
|
|
|
|
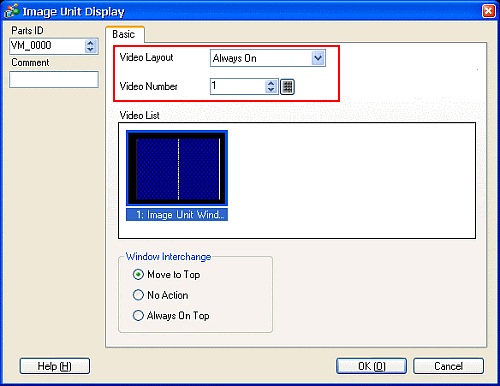
10.
|
Double click the placed [Image Unit Display] to open the following dialog box.
Set the [Video Layout] to "Always On" and specify the [Video Number] (e.g.: 1).
|
|
|
|
|
|
Click [OK] to finish the settings.
|
|
|
| NOTE |
| * |
After you set up a video screen, the  icon appears on the [Image Unit Display]. Clicking the icon displays
the set video screen. This feature is useful for checking or changing the video settings. icon appears on the [Image Unit Display]. Clicking the icon displays
the set video screen. This feature is useful for checking or changing the video settings. |
|
|