|
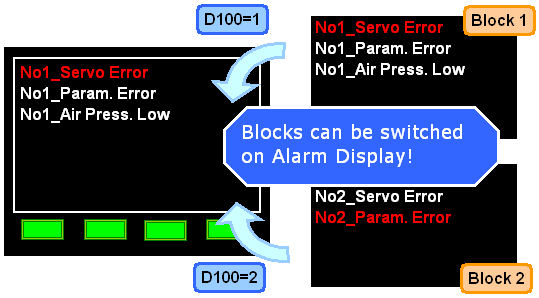
By specifying a block number with an address value, you can switch between multiple
blocks and display on one Alarm part. There is no necessity to make separate screens for each block (such as on a production
line) and you can manage alarm messages on one screen.
|
|
|
|
| NOTE |
| * |
Specify a block number with an address of 1 to 8 to display the alarm messages of the block.
If you specify a number other than 1 to 8, the Alarm part will not display any messages. |
| * |
If an address of a block number is set in 32 bits, only the lower 16 bits are enabled. |
| * |
If you change the block number when the Alarm display is in the Freeze mode, the Freeze
mode will be canceled forcibly. |
| * |
If you change the block number when a message is selected with a cursor, the cursor selection
will be canceled. |
| * |
Even if you change the block number when a Sub screen is displayed, the Sub screen will
remain on the screen. |
|
|
* |
Setup Procedure
|
| |
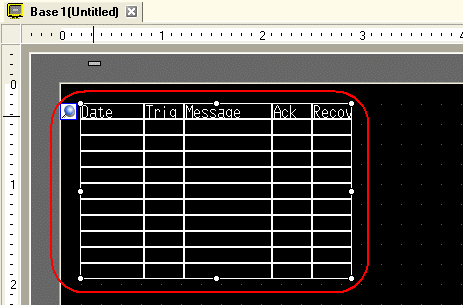
1. |
Open a screen with an Alarm part, (e.g.: Base 1)
then double click the Alarm part.
|
|
|
|
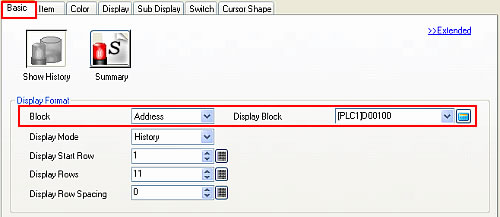
2.
|
The Alarm setting dialog box opens. On the [Basic] tab, set the [Block] to "Address" and enter an address (e.g.:[PLC1]D00100)
into the [Display Block]. Then click [OK] to close the dialog box.
|
|
|
|
|
3.
|
From the [Parts (P)] menu → [Data Display (D)], select [Numeric Display (N)] or click 
and place the part on the
screen. |
|
|
|
|
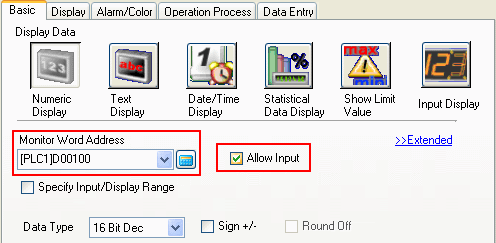
4.
|
Double click the placed Data Display part, the settings dialog box will open. Set the [Monitor Word Address] to the same
address as the one set for the [Display Block] in step 2. Then check [Allow Input]. By doing so, you can enter block numbers
into the Data Display from a pop-up keypad.
|
|
|
|