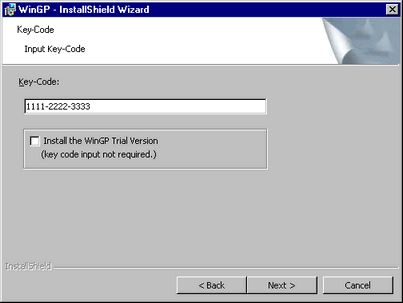
38.3.2.1 Install Procedure - WinGP

  1. Insert the GP-Pro EX Installation DVD-ROM into the CD/DVD drive of an IPC or PC/AT compatible machine.

  2. In the installation set up, click [WinGP].

  3. Follow the instructions in the installation wizard to complete installation.

  4. During installation, you are asked to enter the key code. Enter the license key code (Type: EX-WINGP-IPC), sold separately.

  5. Select the installation folder.

    • If the installation folder is not in Program files (for example, “C:\Pro-face\WinGP”), you can operate using the same procedure as GP-Pro EX Ver.4.09.250 or earlier.

    • Changing the installation folder increases the vulnerability to security threats such as unauthorized access and tampering with the user environment. To protect the user environment from threats, we recommend the default installation folder.

  6. After WinGP is installed, click [Continue] to install the WinGP SDK.

    • WinGP SDK is software that allows WinGP to communicate with external applications created with VB .NET, Visual Basic, Visual C++, and so on. If Pro-Server EX V1.10 or later is already installed, WinGP SDK will not install. In this case, the device access API is available on Pro-Server EX V1.10 or later. For restrictions on installation, see the following.
      38.11.1 Restrictions On WinGP Installation

  7. The completion message appears after installation is done.

  8. Once the installation is complete, the following message appears. Select [Yes] and restart the IPC (or PC).

    • After the installation, restart the IPC before using WinGP. The WinGP will not operate properly without restarting the IPC.