Download the installer "MDA_Utilities_V***_EN.zip" onto the host computer and unzip the file.
Run setup.exe, and follow the on-screen instructions to install the drivers and the utilities.
When some Windows Updates required for installing MDA Utilities have not been installed in your computer, following message will be shown. Please download and install the instructed Windows Update from Microsoft Update Catalog.
The required Windows Updates are following:
KB3123479, KB3138612, KB3033929
After installation is completed, as instructed, restart the host computer.
Basic Configuration
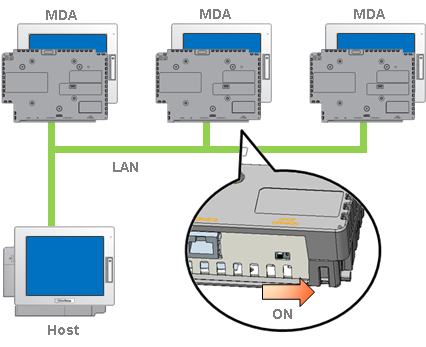
Connect Multi Display Adapter (hereinafter called MDA) to the host computer via Ethernet cable.
Turn on DHCP switch of the MDA and plug the power. Turn on only one MDA if you have several MDA on the same network.
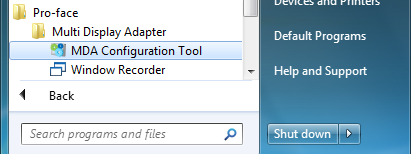
Run the utilities from the Windows® Start menu -> Pro-face -> Multi Display Adapter -> MDA Configuration Tool.
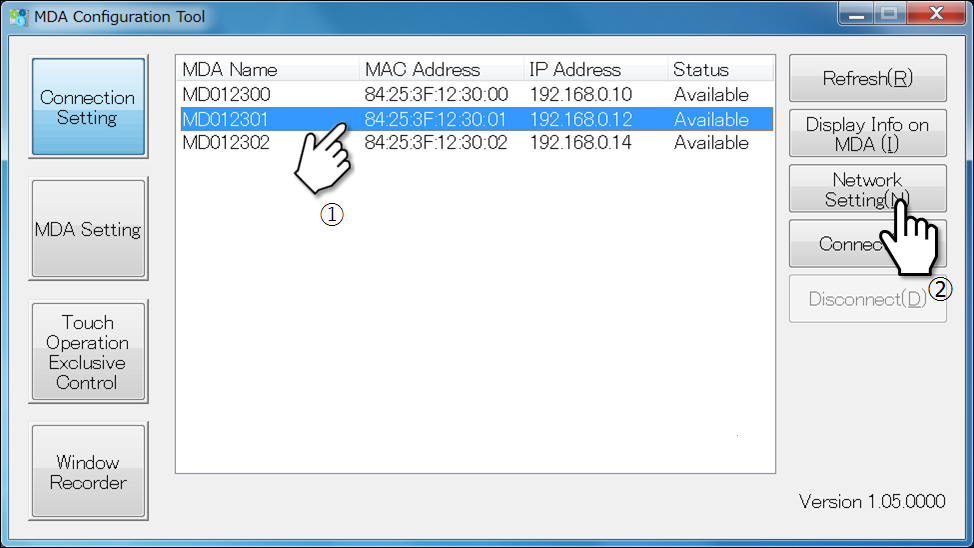
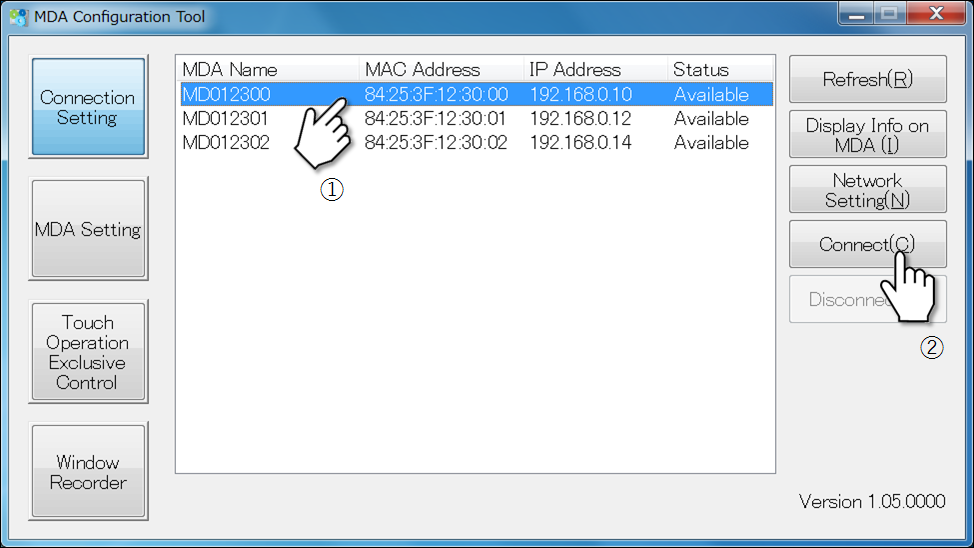
Select a MDA from the list and push Network Settings button. If you have several MDA on the same network, configure in order from MDA that DHCP switch does NOT enabled.
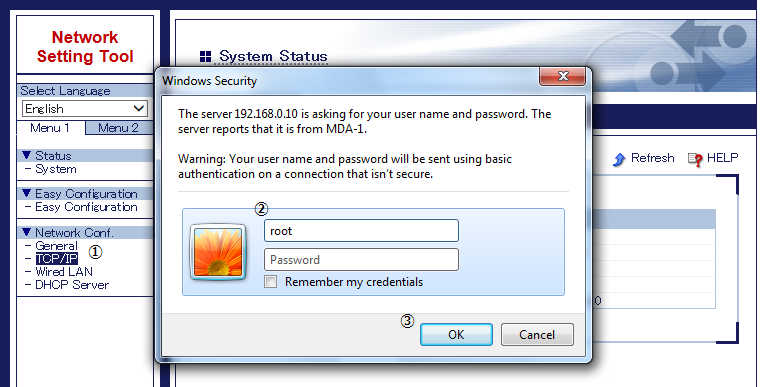
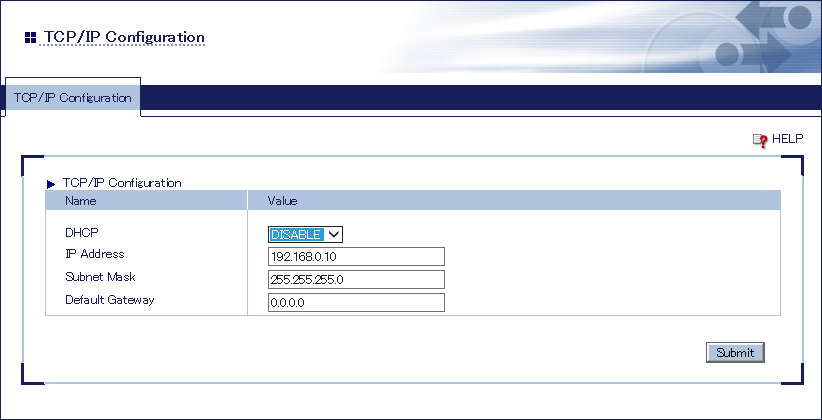
Select TCP/IP from the menu. Then, Security Window show. Enter "root" as the user name and press OK.
Disable the DHCP. Change IP address to the unique one. For example, If you have 3 MDA on the same network, 1st one is "192.168.0.100", 2nd one is "192.168.0.101", and the last one is "192.168.0.102". After that, press Submit button to store the settings.
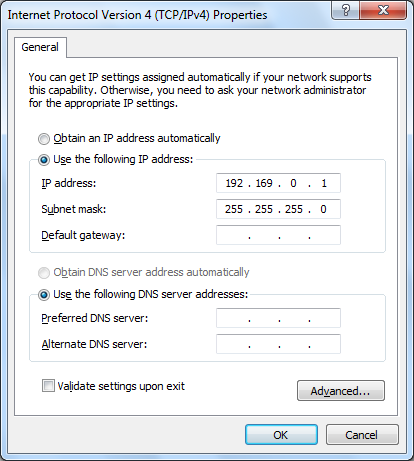
Change IP address of the host PC to communicate with MDA. For example, when MDA's IP address configured "192.168.0.100", configure Host PC's IP address to "192.168.0.1".
Select a MDA from the list and push Connect button.
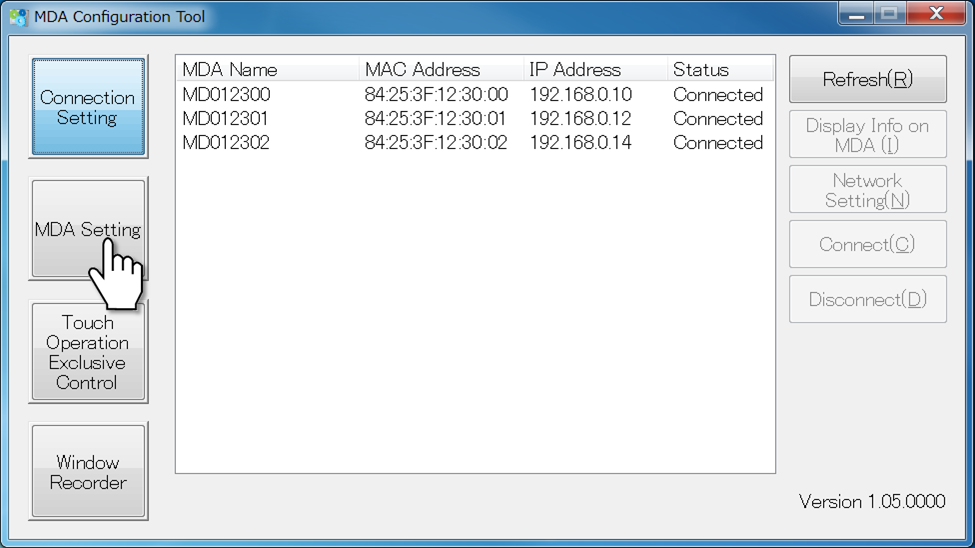
After connection is completed, push MDA settings.
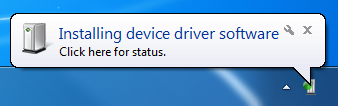
Even after the device connection is completed, when the driver is not installed, a message, "Please wait. Getting ready the drivers.", will be shown.
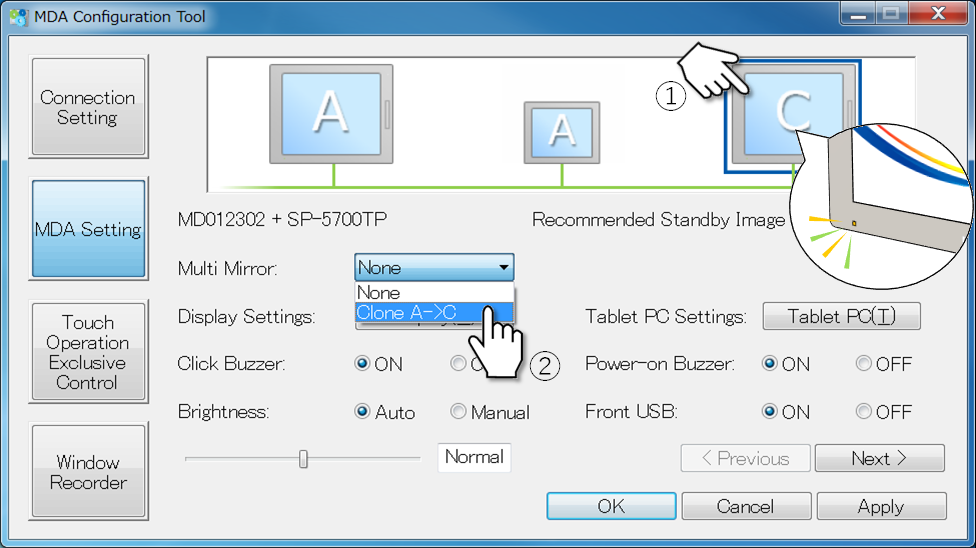
Set the Clone mode in Multi Mirror to display same screens on all MDAs.
When a MDA is selected, the LED of Display Module attached to the selected MDA blinks green and orange.
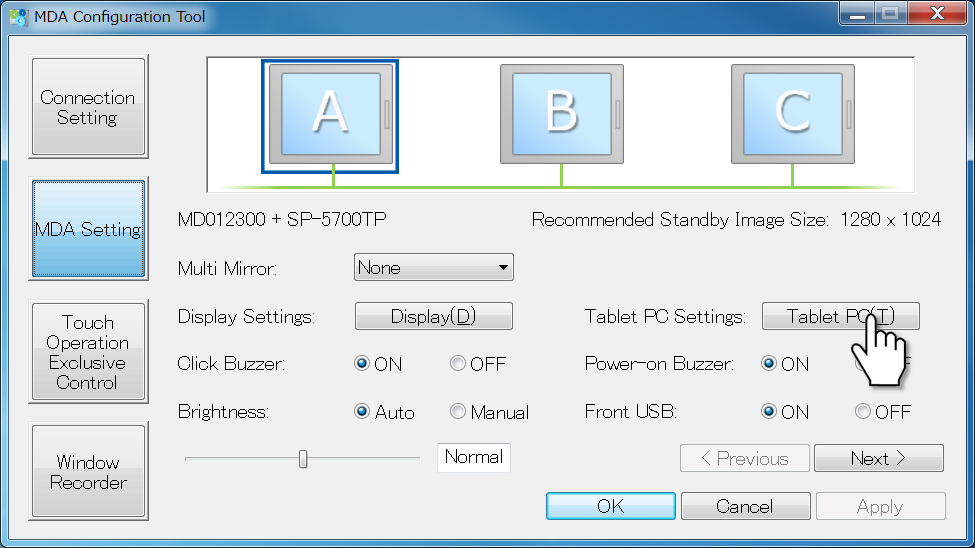
Set the screen resolutions and orientations from Display Settings.
After configuring the Display Settings, start the Tablet PC Settings to link touch panels and screens.
Note:
After cofiguring the link settings, if you change the Multi Mirror or Display Settings, the link settings may be reset. If you change the Multi-Mirror or Display Settings, please configure the link settings again between touch panels and screens.
If you are unable to start Tablet PC Settings by touch after changing screen configuration from default, use a mouse or a key board to start Tablet PC Settings.
Now basic configuration is completed. For other settings, refer to the user manual.