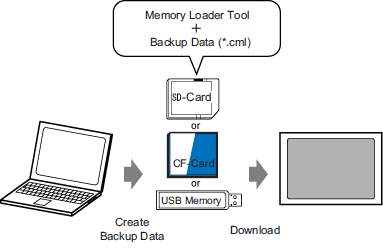
Create project backup data on external storage and start the project on the display unit from the external storage. (When you create backup data on your PC, the Memory Loader Tool is automatically saved in external storage. This tool is necessary for starting up projects on the display unit.)

You need to format (initialize) the external storage device in FAT. Format using your computer.
When the display unit is in the same state as when it was purchased and the Memory Loader is used to transfer the project, after the display unit is restarted the setup screen for the connection key will appear. Follow the prompts to set the connection key.
![]() 34.14.4 How the Connection Key Works
34.14.4 How the Connection Key Works
![]()
Please refer to the Settings Guide for details.
![]() 34.12.2 Memory Loader
34.12.2 Memory Loader
If transfer is not successful even though the steps are followed, refer to the following.
![]() Maintenance/Troubleshooting Guide - T.2.5 Unable to transfer to external storage (Use the memory loader tool)
Maintenance/Troubleshooting Guide - T.2.5 Unable to transfer to external storage (Use the memory loader tool)
Transferring Project Files from PC to Display Unit
The following shows the process for using a CF Card.
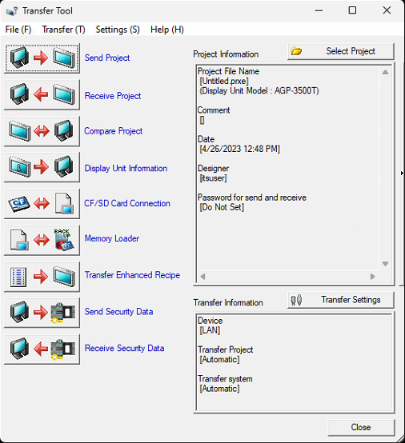
On the GP-Pro EX status bar, click the Transfer Project icon ![]() and launch the [Transfer Tool].
and launch the [Transfer Tool].
![]()
When the edited project has not been saved, a dialog box displays to confirm the save operation. Click [Yes] to save.
![]() 34.14.1 How Send Works
34.14.1 How Send Works
In [Select project], select the project you wish to transfer.
![]()
You can set up the connection key in the [Transfer Settings]. By setting the connection key, you can skip having to enter the connection key whenever restarting the display unit.
![]() 34.12.1.1 Transfer Settings
34.12.1.1 Transfer Settings
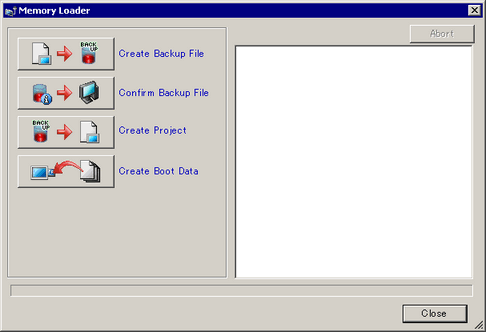
Click [Memory Loader] to open the following dialog box.
Click [Create Backup File].
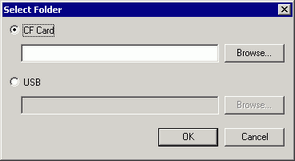
Select [CF/SD Card] and click [Browse].
![]()
When the CF Card output folder is set as the temporary storage for a project, the output folder path is displayed in the [Select Folder] dialog box.
![]() 3.6.2 Procedure - Setting the Destination Folder
3.6.2 Procedure - Setting the Destination Folder
In the [Browse For Folders] dialog box, specify the CF Card's root folder (directory) and click [OK].
![]()
When the [CF Card Folder] is set as the temporary storage of a project, do not click [Browse]. Click [OK].
To start creating data, in the [Select Folder] dialog box, click [OK].
While creating data, the following dialog box appears to show the creation status.
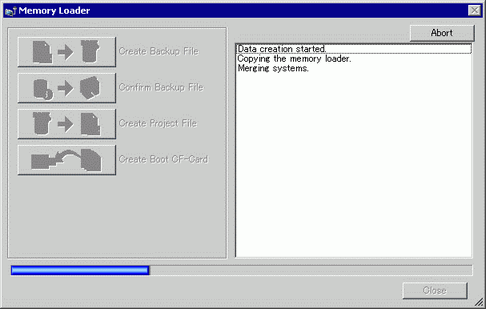
![]()
In the [Transfer Settings], when [Set up initial connection key] is selected, a dialog box displays for whether or not the connection key is set up on the display unit. By setting the connection key on the display unit, you can skip having to enter the connection key whenever restarting the display unit.
After data creation is complete, click [Close]. The created data is saved in the CF Card.
![]()
When [CF Card Folder] is being used as a temporary place to store the project, data is output to the defined path. Copy all data in the [CF Card Folder] to the CF card's root folder.
Insert the created CF Card in the display unit.
To display the system menu, touch the top-right then the bottom-left corner (or the top-left then bottom-right corner) within 0.5 seconds, of the display unit screen.
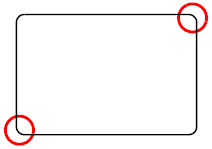
![]()
To start the CF Card, you can either use the system menu or the DIP switches on the back of the display unit. Turn the display unit's power OFF, turn ON DIP switch 1, and then turn the power back ON to launch the Memory Loader tool. You cannot use the DIP switches to start the CF Card when using USB Storage.
When transferring data to the display unit for the first time (for a newly purchased display unit), touch [Trigger Device] on the [Initial Start Mode] screen that appears when the power is turned on (or touch [Boot] on the [Welcome] screen) to use the Memory Loader feature.
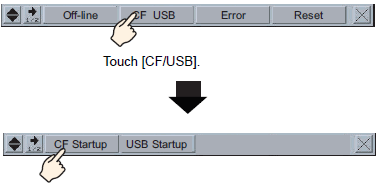
Touch [CF/USB]. Touch [CF startup] to automatically reset the display unit.
The Memory Loader Tool launches and the following screen opens. Touch [Download].
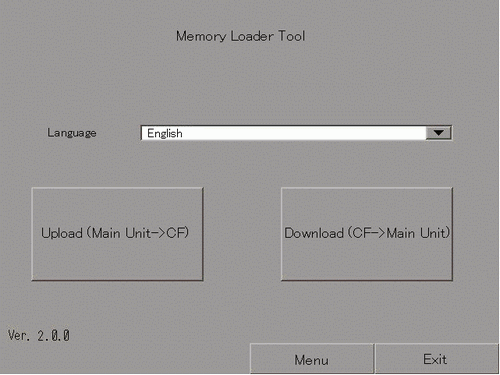
Select a file you want to transfer with [Select File] and touch [Start] to start the download. (If there is a password for transferring, input the password first, then touch [Start].)
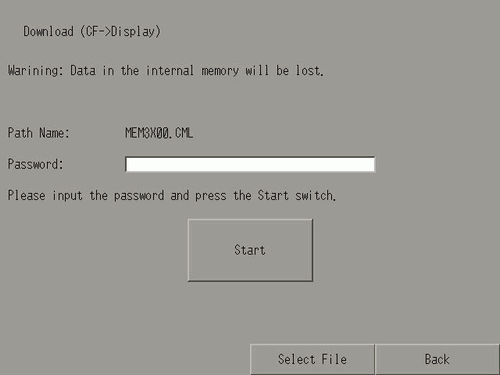
Once you start downloading, all project data on the display unit is deleted, including data in backup memory.
If you performed CF Start with the DIP switch, turn the Number 1 DIP switch back OFF.
![]()
When using GP-4100 Series (Monochrome Model), the password input keypad is separated into alphabetic input and numeric input keypads. Use the [A->1] and [1->A] keys to change keypads.
The input character changes every time you touch a key on the alphabetic keypad.
Once downloading is complete, touch [Back] and then [Exit] to exit the Memory Loader Tool.