-
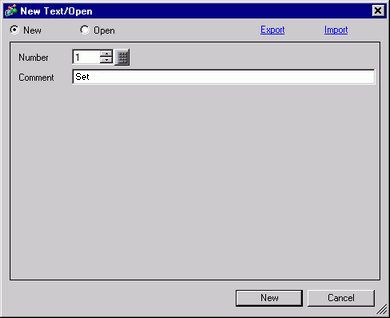
Saves used multilanguage text. From the [Common Settings (R)] menu, select [Text Registration (T)] or click  . The [New Text/Open] dialog box appears.
-
Set the text number and comment, then click [New]. The text input screen appears.
For example, Number = "1", Comment = "Set"
-
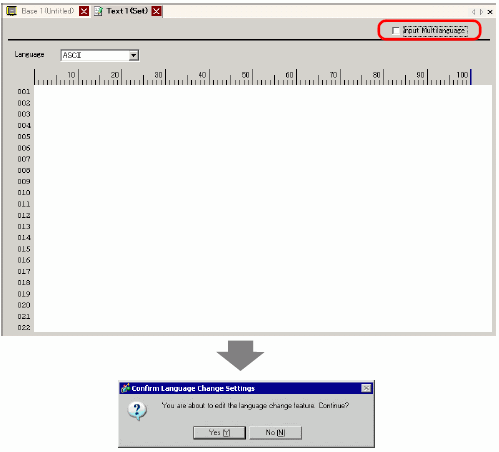
Select the [Input Multilanguage] check box. The following message appears. Click [Yes (Y)].
-
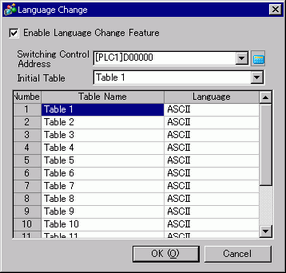
The [Language Change] dialog box appears. Select the [Enable Language Change Feature] check box.

-
If you clear the [Enable Language Change Feature] check box, the Text Table data is deleted.
-
In the [Switching Control Address] field, set the address to store the Table Number to display.
-
In the [Initial Table] drop-down list, set the table to display when the [Switching Control Address] is set to "0". (Table 1)
-
Select each Table's display language and click [OK].
For example, Table1= ASCII, Table2= Japanese
-
Enter the text to display for each table.
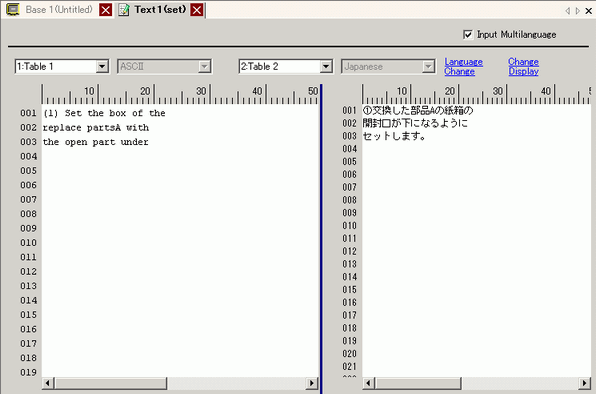
Text table registration is complete.
-
Next, configure the Message Display settings. Open the drawing screen. From the [Parts (P)] menu, select [Message Display (M)] or click  . Place the Part on the screen.
-
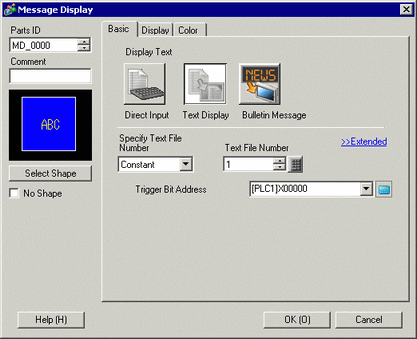
Double-click the new Message Display. The following dialog box appears. Click the [Text Display] icon.
-
In the [Specify Text File Number] drop-down box, select the method of specifying text to display. Set the [Text File Number].
-
In [Trigger Bit Address], set the address (M100) which will trigger the text display.
-
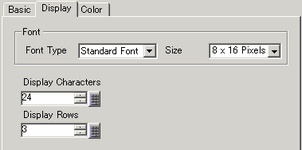
Click the [Display] tab. Set the [Display Characters] and [Display Rows].
-
Set "1" to [Display Characters] to display one single-byte character. Set "2" for one double-byte character.
-
As needed, set the Message Display color and text color on the [Color] tab, and click [OK]. The Message Display settings are complete.
-
Create a switch to change languages. From the [Parts (P)] menu, point to [Switch Lamp (C)] and select [Word Switch (W)] or click  . Place the switch on the screen.
-
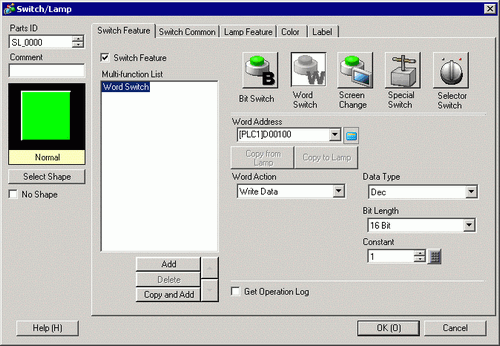
Double-click the placed Switch part. The following dialog box appears.
-
In [Select Shape], select the Switch shape.
-
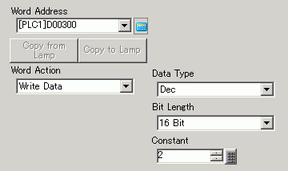
In the [Word Address] field, set the same address (D300) as the set [Switching Control Address].
-
In the [Word Action] drop-down list, select [Write Data]. Set [Constant] to 1.
-
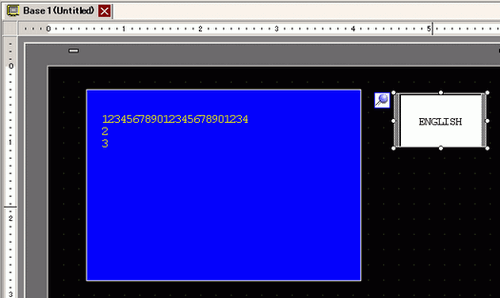
Specify the color and label for the switch on the [Color] tab and [Label] tab as required, and click [OK]. The switch for changing to English text (Table 1) has been created.
-
Create the same kind of Switch to change to Japanese text (Table 2). The settings for the Switch are as follows.
-
If you change tables (languages), all the text using Text Table, as well as the text, is changed.
 17.7 Common Settings (Text Registration) Settings Guide