On the [Start] menu, click [Programs], point to [Pro-face], [WinGP], and then click [WinGP]. Or from the desktop double-click ![]() .
.

You cannot transfer files while in offline mode. Be sure WinGP is online.
On the GP-Pro EX state tool bar, click [Transfer Project] to launch the transfer tool.
Confirm the project details in [Project Information]. To transfer a different project file, click the [Select Project] button and select the project file.
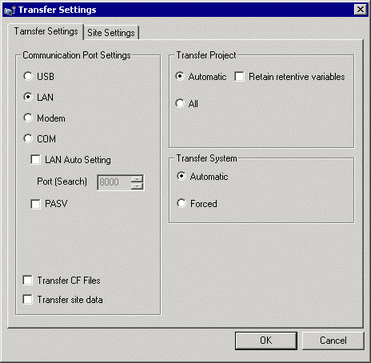
Click the [Transfer Settings] button.
In [Communication Port Settings], select the [LAN] option. Clear the [Automatic] check box and click [OK].
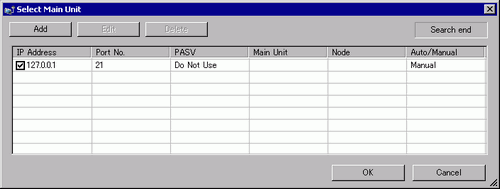
Click [Send a Project]. The [Select Display Unit] dialog box appears.
Click [Add]. Enter [127.0.0.1] in [IP Address] and click [OK].
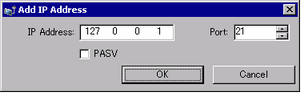
The IP address [127.0.0.1] is a virtual address that indicates the computer you are currently using on the network.
Make sure the [Port] number matches the port number defined in the [System Settings] window [Display Unit] page, [IPC Settings] tab [Transfer Settings] area.
Select the [127.0.0.1] check box displayed in [IP Address] and click [OK].
When the following dialog box appears, click [Yes]. (The dialog box will not appear if you transfer the same project again.)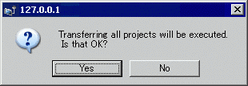
To transfer the project file, you can also use [ProjectCopy] (copy tool). For information on the setup procedure, see the following. 38.3.4.1 When Using Different Computer for Running WinGP, CF Card or USB Storage Transfer.