Draws pictures. The drawing procedure is the same as 5.2.1 Procedure - Starting/Creating/Saving/Exiting. You can also refer to chapters related to particular features, such as alarms.

Since the display unit and IPC or PC/AT compatible machines are different pieces of hardware, the available features are different. For features available in WinGP, see the following.
 38.1.4 Differences with Display Unit - WinGP
In the System Settings window, select [Display Unit] and click the [IPC Settings] tab. Select the [Display Right-Click Menu] check box. When selected, the right-click menu enables you to change screens or go to Offline mode.
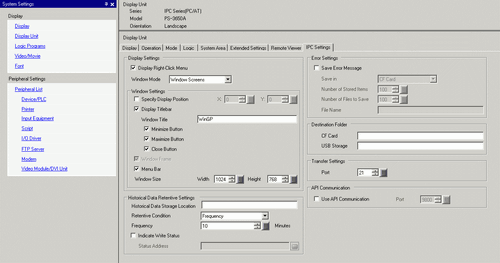
From [Window Mode], select [Window Screens].
As required, in the [Window Settings], define the window display position and show or hide the window titlebar.
When using the backup SRAM to store alarms, sampling data, or recipe files, in the [Historical Data Retentive Settings] area's [Historical Data Storage Location] field, type the folder path that will be used to emulate the SRAM backup function.

If you do not input a path, it is saved to the following WinGP installation folder, "NAND\PRJ001\USER\SCREEN".
When setting up destination folders in the [Destination Folder] area, in the [CF Card Folder] or [USB Storage Destination Folder] fields, type the path where data will be output, relative to the Screen Transfer destination. WinGP references the data (such as Recipes) in the folder defined here.
If you do not input a path, it is saved to one of the following WinGP installation folders: "CFA00" or "USBHD".
Define a Destination Folder that is different from the [CF Card Folder] or [USB Storage Destination Folder]. Otherwise, an error will occur.
From the [Project (F)] menu, select [Save as (A)]. Define the location and file name for the project.