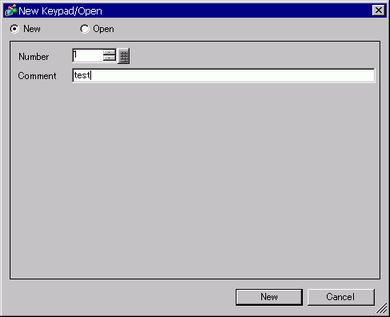
From the [Common Settings (R)] menu, select [Keypad Registration (K)]. The [New Keypad/Open] dialog box appears.
Set the [Number] and [Comment] and then click [New]. (For example, [Number] 1, [Comment] test)
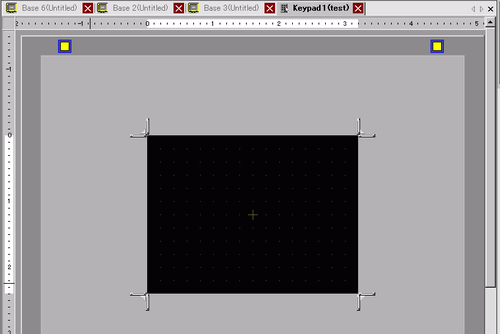
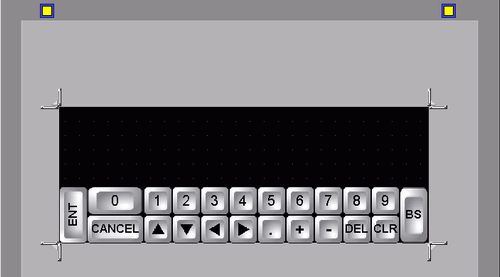
The screen to create the keypad [Clear Area] appears.
-
From the [View (V)] menu, select [Package (P)] or click  to display the [Package List] dialog box.
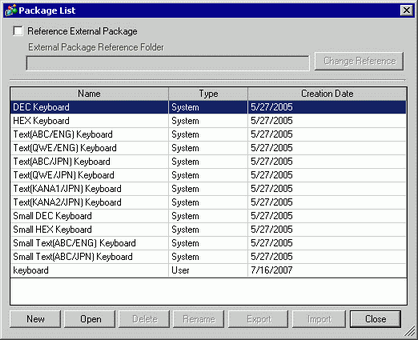
Select the package name (for example, Keyboard) that is registered with the keypad you want to use, click [Open], and the [Package] dialog box appears.
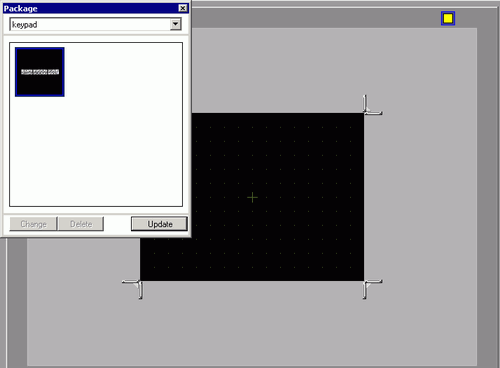
Select a keypad to use and place it on the [Clear Area].
-
Create the keypad [Clear Area]. Drag the [Resize Boundary]  in the four corners of the [Clear Area] setting screen to change the size. The [Resize Boundary] button you drag with the mouse cursor determines the direction in which the clear area size changes.
Click the [Base 1] tab to move to the base screen.
Configure settings to use the custom keypad with a Data Display. From the [Parts (P)] menu, point to [Data Display (D)] and select [Numeric Display (N)], or click the  icon, and place it on the screen.
Double-click the placed element. The Data Display dialog box appears.
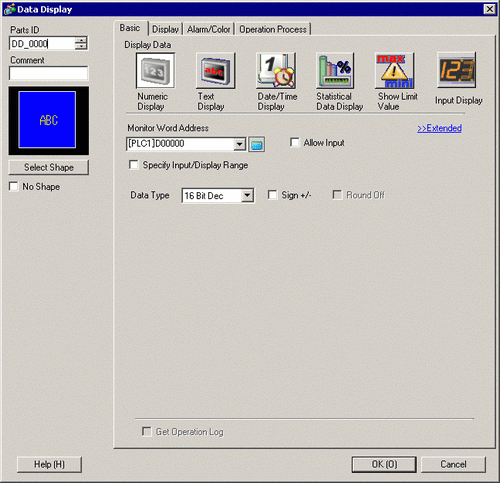
Click [Select Shape] and select the appropriate shape.
In [Monitor Word Address], set up the address to store the numeric value.
In the [Data Type] drop-down list, set the type of data to display.
Select the [Allow Input] check box. Once you select the [Allow Input] check box, the [Data Entry] tab appears and you can enter numeric data.
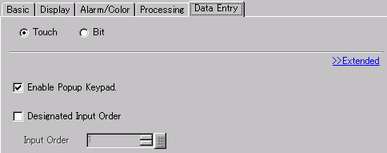
Click the [Data Entry] tab and the following appears. Select the [Enable Popup Keypad] check box.
Specifies whether or not to keep the output when the logic program is off
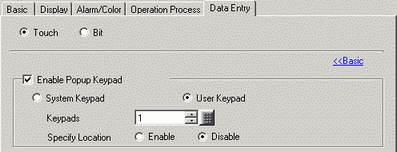
In the [Extended] screen, select the [User Keypad] check box and set the [Keypad] screen number (for example, 1) with the keypad setting to the [Keypads].
As needed, specify the Data Display's color and text on the [Alarm/Color] tab and [Display] tab, and click [OK].
 15.6.2.1 Keypad Registration - New