33.2.2 USB Transfer - Transferring from Display Unit to Computer (Receive)

Receives project data currently stored on the display unit to a PC.


  1. Connect the computer and display unit using the USB transfer cable.
    If the USB cable driver is not installed, a dialog box appears. Install the driver as directed.

    • For information about USB cables and installation methods, see the following.
      33.2 Transferring Project Files via USB Transfer Cable

    • Depending on your Windows XP Security Level settings, the following [Install Hardware] dialog box may appear during USB driver installation. Click [Continue (C)] to start installation of the driver. Once installation is complete, click [Finish].

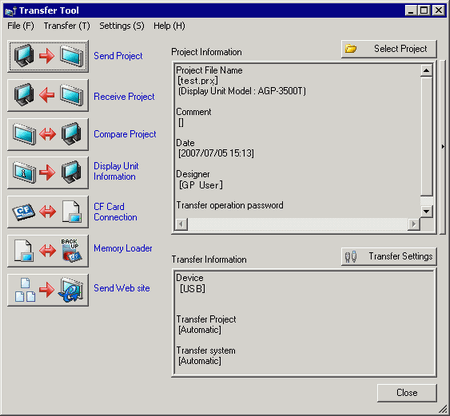
  2. On the GP-Pro EX state tool bar, click the Transfer Project icon . The [Transfer Tool] dialog appears.

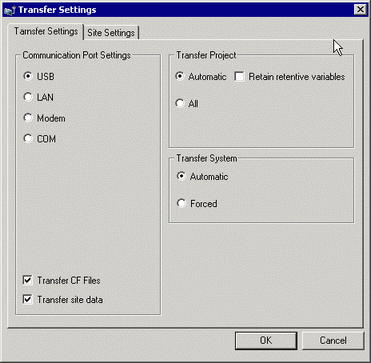
  3. In [Transfer Information], acknowledge that [Device] is [USB]. If [USB] is not selected, click [Transfer Settings] to display the [Transfer Settings] dialog box below. In [Communication Port Settings], select [USB] and click [OK].

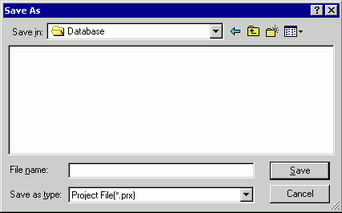
  4. Click [Receive Project]. When the following dialog box appears, specify the location to save the data you are receiving and its project file name. Click [Save] to start the transfer.

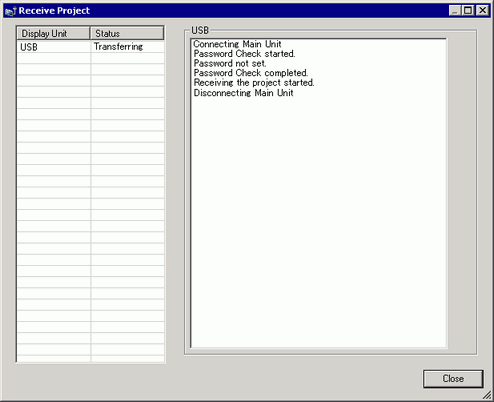
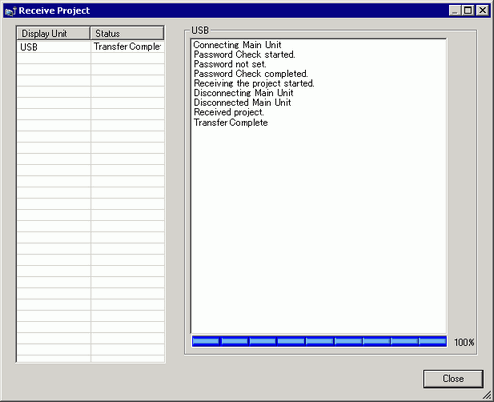
    The following dialog box appears during transfer to check the communication status.


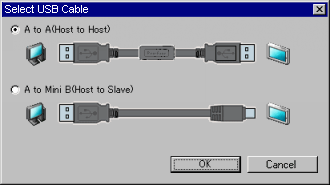
    • When the USB data transfer cable (CA3-USBCB-01) and GP-4100 series proprietary cable (ZC9USCBMB1), or USB data transfer cable (CA3-USBCB-01) and standard USB cable (Type A mini B) are connected, the [Select USB Cable] dialog box will display. Please select which USB cable to use.

      [A to A (Host to Host)]: Select when using CA3-USBCB-01.
      [A to Mini B (Host to Slave)]: Select when using ZC9USCBMB1 or standard USB cable (Type A mini B).

  5. When transfer is completed, the state of the dialog box changes from [Transferring] to [Transfer Complete]. Click [Close].

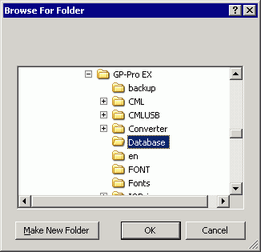
    If you receive a project file that uses CSV Data Recipes or other CF Card data, the following dialog box appears. Click [OK] to finish the process.

  6. Click [Close] to return to the Transfer Tool. Click [Close] again to close the Transfer Tool.