Either double-click the shortcut ![]() on the desktop, or from the [Start] menu, click [WinGP] - [WinGP].
on the desktop, or from the [Start] menu, click [WinGP] - [WinGP].
Switches to offline mode.
![]()
-
When the [Welcome] screen is displayed, click [Transfer Memory Loader].
-
If you are using WinGP that was not installed in the Program files folder, skip to step 5 without switching to offline mode.
In offline mode, click [Transfer] - [Transfer Project File].
In the dialog box that displays, touch [Yes] to start WinGP. WinGP started with administrator rights displays in a separate window.
On the GP-Pro EX state toolbar, click [Transfer Screen] to launch the transfer tool.
Confirm the project details in [Project Information]. To transfer a different project file, click the [Select Project] button and select the project file.
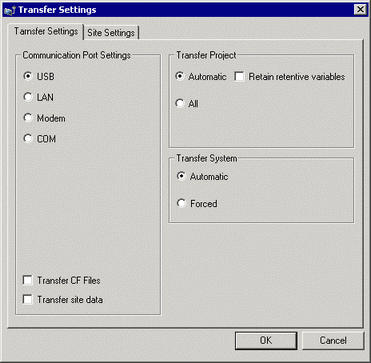
In the [Transfer Settings] area, confirm that the USB or LAN option is selected. If neither [USB] nor [LAN] is selected, display the [Transfer Settings] dialog box and in the [Communication Port Settings], select either [USB] or [LAN] and click [OK].
![]()
-
Modem transfer is not available.
Click [Send Project].
The following process is the same as the GP. See the following. After transfer is completed, WinGP is restarted if it was started with user rights. WinGP exits if it was started with administrator rights.
![]() 34.2 Transferring Project Files via USB Transfer Cable
34.2 Transferring Project Files via USB Transfer Cable
![]() 34.3 Transferring Project Files via Ethernet (LAN)
34.3 Transferring Project Files via Ethernet (LAN)