In GP-Pro EX, open a Base Screen, and from the [Parts (P)] menu select [Remote PC Access Window Display (I)] or click ![]() to place the Remote PC Access Window Display.
to place the Remote PC Access Window Display.
Double-click the allocated remote PC access window display to open the Settings dialog box.

On the [Basic] tab, from [Type], select [Activate Switch].
Enter the IP address and port number of the server computer connected to the [Remote PC Access Server Address] and [Port Number], respectively.
(For example: IP Address 192.168.0.1, Port Number 5900)
In [Password], enter a password up to a maximum of 30 single-byte alphanumeric characters.
![]()
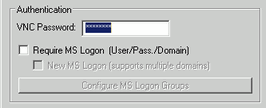
You must enter the same password in [Remote PC Access Window Display] as the [VNC Password], defined in the [Win VNC: Current User Properties] dialog box. This dialog box displays when the server PC's Ultra VNC Server starts up.
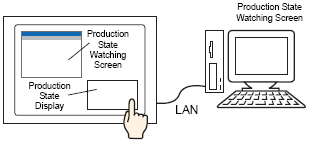
When the Remote PC Access window displays on the display unit, password authentication is performed on both the server PC and display unit. If the password is authenticated, you are connected automatically and future password inputs on the display unit are not required.
Select the server display screen size in [Server Display Scaling]. (For example: [Actual size])
Select the [Enable Popup Keypad] check box and select the type of keypad from [Full Keypad] or [Numeric keypad].
![]()
Operating the mouse or keypad connected to the USB port on the display unit can occur only when the Remote PC Access Window is displayed. In such a scenario, there is no need to pop up a keypad.
Refer to the following setup to operate the mouse or keypad connected to the display unit. For more details, please refer to the following.
![]() 36.4.2 Input Equipment (Remote PC Access Input) Settings
36.4.2 Input Equipment (Remote PC Access Input) Settings
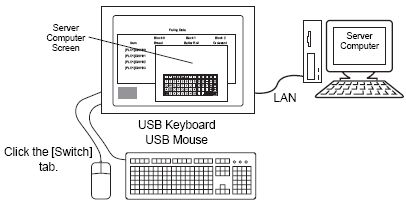
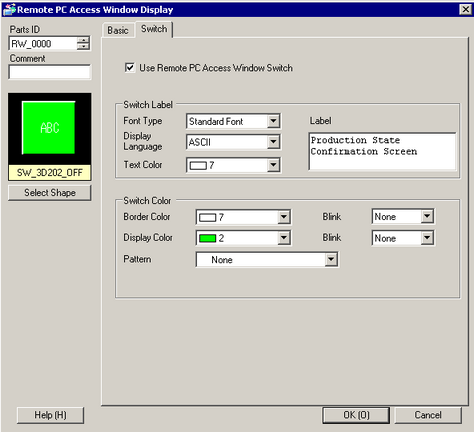
Click the [Switch] tab, and confirm the [Use Remote PC Access Window Switch] check box is selected.
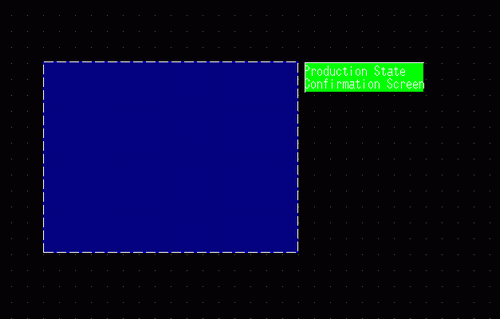
Set each item on [Switch Label] and [Switch Color] as necessary. (For example, Production State Confirmation Screen)
![]()
Depending on the shape, you may not be able to change the color.
When you select a switch and press the [F2] key, you can directly edit the text on the label.
You can set this switch by setting [Special Switch] - [Use Remote PC Access Window Switch].
![]() 10.15.4 Special Switch
10.15.4 Special Switch
When you select [Bit Trigger] in the [Basic] tab’s [Type], the [Switch] tab does not display. Separately create an ON switch, D-Script, Logic Program, and so on, for the bit specified in [Remote PC Access Trigger Bit Address].

Click [OK].
Transfer Projects to the Display Unit.