![]()
-
Please refer to the Settings Guide for details on setting the Data Display's "Numeric Display".
 14.11 Data Display Settings Guide
![]()
Please refer to the Settings Guide for details on setting the Data Display's "Numeric Display".
![]() 14.11 Data Display Settings Guide
14.11 Data Display Settings Guide
|
Numeric Display |
|
From the [Parts (P)] menu, point to [Data Display (D)] and select [Numeric Display (N)], or click the ![]() icon, and place it on the screen.
icon, and place it on the screen.
Double-click the Data Display part to open the setting dialog box.
Select the Data Display shape from [Select Shape].
From the [Display] tab's [Font Settings], select [Bitmap Font] for the [Font Type].
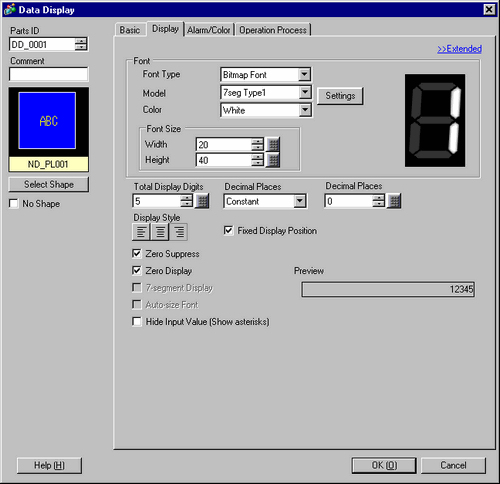
Select the [Model] for the bitmap font and the [Color].
(Example: Model = [Meter] and Color = [Blue]) You can preview the selected model and color. By clicking the [Settings] button, you can preview all characters of the selected model, such as numeric values and symbols.
In [Font Size], enter the bitmap font's width (1 to 200) and height (1 to 400).
To make the font background transparent, select the [Transparent] check box.
![]()
Depending on the model, you may not be able to use the transparent setting.
Set the [Basic] tab and others as necessary and click [OK].
When using the Data Display as both a numeric display and data input, in the [Basic] tab select the [Allow Input] check box and define the settings in the [Allow Input] tab.
![]()
If a Data Display set up with bitmap fonts is in the input state, numbers and text in the cursor position will not reverse its display and the cursor frame will blink. (Only for Data Displays that do not use a popup keypad)
However, reverse display works when both Transparent and Alarm Settings are enabled. Before setting up the bitmap font, if you set the same color for the [Display Color]'s [Numeric Value Color] and [Plate Color], the color will not change when reverse display takes place.