![]()
-
Please refer to the Settings Guide for details.
 20.12.2.9 Show History - Switch Settings
 -
For details on how to draw parts, and defining the address, shape, color, and labels, please see Editing Parts.
8.7.1 Editing Parts
![]()
Please refer to the Settings Guide for details.
![]() 20.12.2.9 Show History - Switch Settings
20.12.2.9 Show History - Switch Settings
For details on how to draw parts, and defining the address, shape, color, and labels, please see Editing Parts.
![]() 8.7.1 Editing Parts
8.7.1 Editing Parts
Double-click the new Alarm part. The Alarm dialog box appears. Open the [Switch] tab, and select the check box options you want.
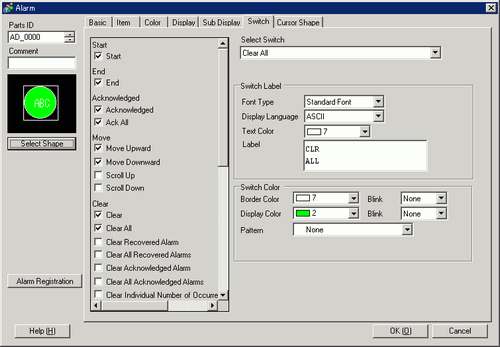
Select the Switch shape from [Select Shape].
Choose the switch with [Select Switch], and designate the switch label [Font Type], [Display Language], [Text Color] and [Label].
As necessary, set the Switch colors in [Switch Color].
![]()
Depending on the shape, you may not be able to change the color.
When you select a switch and press the [F2] key, you can directly edit the text on the label.
The Switch Color and Shape settings are common to all Alarm parts, regardless of the switch type selected. To change the shape and color for each switch, use a Switch Lamp Part [Special Switch (Alarm History Switch)].
![]() 10.15.4.1 Special Switch - Switch Features
10.15.4.1 Special Switch - Switch Features
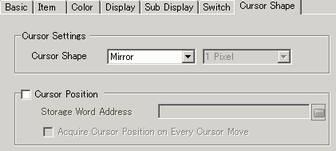
Click the [Cursor Shape] tab, select [Cursor Shape] as [Mirror], and click [OK].