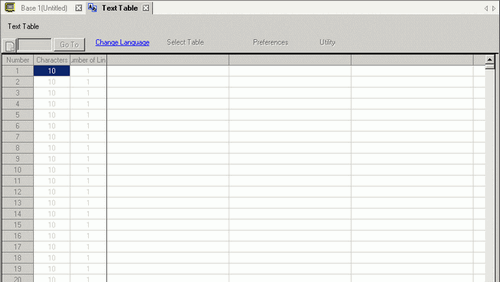
In order to use this feature, from the [System Settings] window's [Display Unit] link, click the [Extended Settings] tab, and in the [Load Text Table] area select the [Enable Load Text Table] check box.
Please refer to the Settings Guide for details.17.12 Common (Text Table) Settings Guide
From the [Common Settings (R)] menu, select [Text Table (S)] or click . The following window opens.
When you edit and use a registered Text Table, open the data you want to edit.
Click [Language Change] The following dialog box appears. Select the [Enable Language Change Feature] check box.
If you clear the [Enable Language Change Feature] check box, the Text Table data that has been specified is deleted.
Select each Table's display language and click [OK (O)].
In the Text Table, set the [Characters] and [Number of Lines] and input words or simple messages in each table and click [OK].
When you completed the entry to Text Table, select [Create Display Unit File] from [Utility].
Select [File Code Type]. The [Destination Folder] allows you to select the folder to save the created file.
Make sure that the table you want to output is selected in [Output Table].
When you click the [Create] button, the Text Table file is created in the destination folder specified in [Destination Folder].
If you want to configure the Text Table data to be read at every startup, from the [System Settings] window's [Display Unit] page, click the [Extended Settings] tab, and in the [Load Text Table] area select the [Read File at Startup] check box. With this setting, it may take some time to start up the display unit.
For details on the settings, refer to the following.5.19.7 Display Unit (Extended Settings) Settings Guide
To load using a defined timing, from the display unit's offline menu touch the [Manually Load] property's [Start] button.
For information about offline mode operations, see the following.Maintenance/Troubleshooing Guide, M.7.1 Reading the string table data stored in the external storage