![]()
Please refer to the Settings Guide for details.
 23.10.1 Common
Settings (Security Settings) Settings Guide
23.10.1 Common
Settings (Security Settings) Settings Guide
![]()
Please refer to the
Settings Guide for details.
![]() 23.10.1 Common
Settings (Security Settings) Settings Guide
23.10.1 Common
Settings (Security Settings) Settings Guide
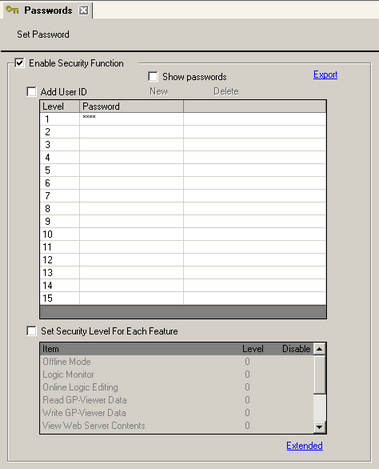
Set the Line Management screen with a security level and password.
![]()
Security level 0 means no security is set.
From the [Common Settings (R)] menu,
point to [Security (Q)] and select [Security Password (P)], or from
the toolbar click ![]() .
.
Password setting screen will open.
Select the [Enable Security Function] check box, and in [Level 1]
enter the password.
![]()
Set a password with up to eight single-byte alphanumeric characters.
Select the [Add User ID] check box to add the User ID to the Password. As with the password, User IDs can be up to eight single-byte alphanumeric characters.
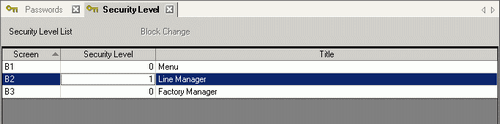
From the [Common Settings (R)] menu, point to [Security (Q)] and select [Security Level List (L)].
Set the Line Management screen (screen
number B2) with security level [1], to complete the settings.
![]()
Once you log in,
the security level you logged in at is enabled until you turn
off the power.
If you logged in with high security, and you leave your desk,
we recommend clearing the security level first to enhance
security.
![]() 23.10.1.1 Password
Settings
23.10.1.1 Password
Settings