![]()
-
For more information about Receive operations, refer to the following.
 34.14.2 How Receive Works
-
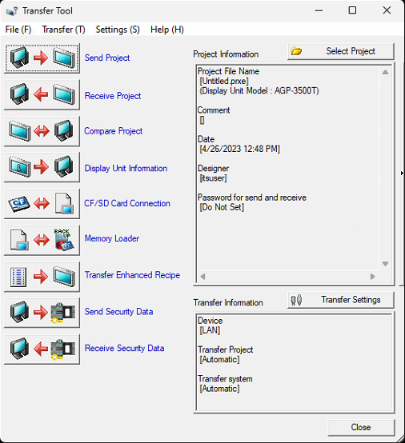
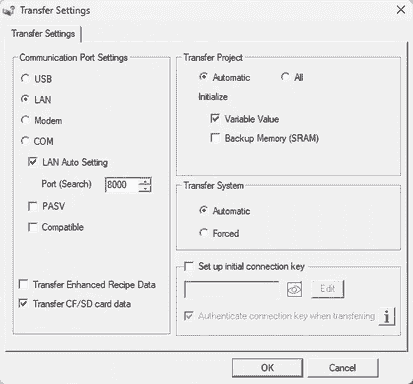
Please refer to the Settings Guide for details.
34.12 Settings Guide
-
If transfer is not successful even though the steps are followed, refer to the following.
Maintenance/Troubleshooting Guide, T.2.3 Unable to transfer project (USB transfer cable)