![]()
-
Please refer to the Settings Guide for details.
 10.15.3 Change Screen Switch
-
For details on how to draw parts and define the address, shape, color, and labels, please see the "Part Editing Procedure".
8.7.1 Editing Parts
![]()
Please refer to the Settings Guide for details.
![]() 10.15.3 Change Screen Switch
10.15.3 Change Screen Switch
For details on how to draw parts and define the address, shape, color, and labels, please see the "Part Editing Procedure".
![]() 8.7.1 Editing Parts
8.7.1 Editing Parts
Configure settings to change the displayed screen by both touch and from a device/PLC.
(Set up so the display changes to screen "10".)
From the [Parts (P)] menu, point to [Switch/Lamp (C)] and select [Change Screen Switch (C)] or click ![]() , and place the Switch on the screen.
, and place the Switch on the screen.
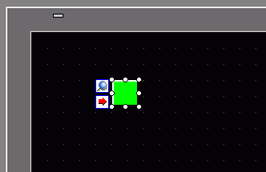
Double-click the placed Switch part. The following dialog box appears.

In [Select Shape], select the Switch shape.
From the [Screen Change Action] drop-down list, select [Screen Change]. Set [Screen Number] to the destination screen number, 10.
As needed, set the color and display text on the [Color] tab and [Label] tab, and click [OK].
![]()
Depending on the shape, you may not be able to change the color.
When you select a switch and press the [F2] key, you can directly edit the text on the label.
When change screen switch is set, the ![]() icon will appear next to the switch on the screen editor. Click this icon to jump to the designated screen. This feature is useful for checking the screen setup.
icon will appear next to the switch on the screen editor. Click this icon to jump to the designated screen. This feature is useful for checking the screen setup.
In the [Project] menu, click [System Settings] and then click [Display Unit]. Open the [Display] tab.
Select the [Reflect in Device/PLC] check box.

![]()
When selecting the [Reflect in Device/PLC] check box, the screen number defined as the start up screen is written to the [Change-To Screen Number] address. When the [Reflect in Device/PLC] check box is cleared, the screen changes to the screen number defined in the [Change-To Screen Number] address. but if the screen number does not have [Change-To Screen Number] values, the screen set as the initial screen number will display.
When you select the [Reflect in Device/PLC] check box, a screen change initiated by touch will write the current screen number to the [Change-To Screen Number (1 Word)] address. If this check box is not selected, and you change screens using a switch, not only is the screen number not written to the device/PLC, but there may be instances when the device/PLC cannot initiate a change screen operation.
For more details, please refer to the following.
![]() 11.8.1 Restrictions for Screen Change
11.8.1 Restrictions for Screen Change
Click the [System Area] tab and set [System Area Start Address].
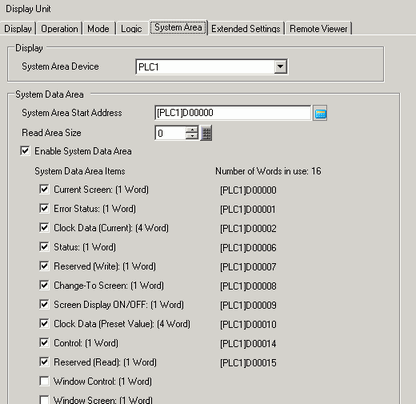
Select the [Enable System Data Area] check box and confirm that the [Change-To Screen Number: (1 Word)] check box is selected.
To change the displayed screen by touch, use the [Change Screen Switch]. To change the displayed screen from the device/PLC, write the destination screen number to the [Change-To Screen Number: (1 Word)] address (Example:[PLC1]D00008). You can now change the displayed screen either by touch or from the device/PLC.