9.2.1 Procedure - Changing a Picture with Bit ON/OFF

  1. Create a screen on which the load operation will take place. (For example, Base1)

  2. On the [Screen (S)] menu, click the [New Screen (N)] command or click .

  3. In [Screens of Type] select [Base], in [Screen] enter 10, and click [New].

  4. Create a screen to be called. Draw a rectangle the same size as the rectangle on Base 1. Set its fill color to red. When this screen is called as a Picture Display, it will affect the color in the overlapping area on the call destination screen, but will not completely obscure the original contents.

    • When the [Display Type] of a Picture Display is [ON/OFF Display] you select the [Clearing Action] check box, the color of the called picture may change where it overlaps with the destination screen background.
      9.8 8-color Combinations

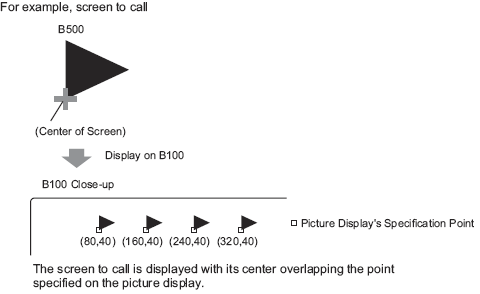
    • To position a called screen, you specify where its center will be placed on the destination screen. Therefore, drawing your picture with a vertex at the center of the drawing area may make it easier to later position this picture on the destination screen.

  5. Click the [Base 1] tab. From the [Parts (P)] menu, point to [Picture Display (F)], or click , and place the picture display on the screen.

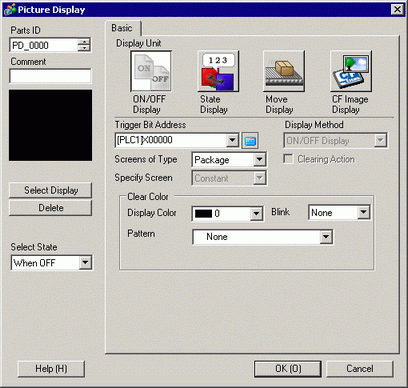
  6. Double-click within the border of the Picture Display part to open the Picture Display dialog box.

  7. Select [ON/OFF Display] and setup the [Trigger Bit Address].

  8. Define the [Screens of Type], [Specify Screen], [Display Method] and [Clearing Action]. For example, in [Screens of Type] select Base Screen, in [Specify Screen] select Constant, in [Display Method] select ON Display, and select [Clearing Action].

    • If [Clearing Action] is not selected when you display pictures of different sizes by turning them ON or OFF, the pictures that already display will not disappear. Instead, new pictures will be overlaid. To avoid visible overlapping, create a background for clearing as follows:

  9. Click [Select Display], select Screen 10, and then click [OK].

  10. The [Picture Display] dialog box appears again. Click [OK]. When the display position pointer displays on the screen, drag it to specify the position of the called picture.