-
Please refer to the Settings Guide for details.
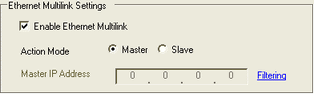
 5.4.7 System Settings [Display Unit] - [Extended] Settings Guide
-
Prepare projects for respective display units to be transferred. Create all the projects using the same version of GP-Pro EX, with the same settings in the [System Settings], [Peripheral Settings] link's [Device/PLC].
-
If you control the same PLC/device address in parts on multiple display units, it may not operate properly.
For example, if you set up the same address in the Data Block Display Graph's control word, even though you update the graph on the Master display unit the graph will update on Slave display units but not the Master display unit. To prevent this type of behavior, use a different address on each display unit.
-
If the [Reflect in Device/PLC] check box is selected (accessible from [System Settings], [Display Unit], [Display Settings] tab), and the same items are used on Master and Slave display units, the [System Area Start Address] will be the same for all display units.
For example, if you change a shared screen number, the Master and all the Slave display units will synchronize their screen displays.