This section explains the setting procedure, using a Bit Monitoring example.
When the Monitoring Bit Address turns ON, the Alarms are displayed together with their trigger date/time. When the Monitoring Bit Address turns OFF, the recovery time is added to the same row.
-
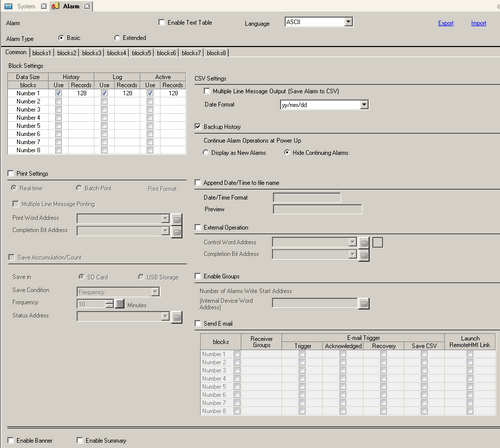
From the [Common Settings (R)] menu, select [Alarm (A)], or click  . The following screen appears. In [Language], select the alarm message display language.
-
In the Block Settings, select the check box for the desired display mode (History/Log/Active) for the block to which the message is registered, and set the number of messages stored as history for each mode.
-
Select [Backup History] and define [Hide Continuing Alarms].

-
When the [Backup History] check box is not selected, the alarm history data will be erased when the display unit is turned OFF or reset.
-
From the [Block1] tab, select [Bit Monitoring].

-
In [Bit Address], set the bit address to monitor the alarm trigger.
-
In the [Trigger Condition] cell, select whether the alarm is triggered when the Monitoring Bit Address turns ON or turns OFF.
-
In the [Message] cell, input the alarm message that will display when the alarm is triggered.

-
Up to 160 single-byte characters can be registered in a single Alarm Message.
-
When the [Enable Text Table] check box is selected, you can change the displayed message language even while the system is running.
 18.3 Changing Text to Other Languages
-
Select the [Read Data From Each Alarm] check box, and specify [Number of Addresses] (for example, 3) to read the data values.

-
When the same address is used in triggered alarms and regardless of the message content, select the [Use the Same Address] check box. The set up address is used for all the messages.
-
Click the [Address1] cell, then click  . The [Trigger Condition Settings] dialog box appears.

-
Set the addresses to read the data values when Alarms triggered.
-
Set the value in [Data Display Style], and click [OK].
-
Specify [Bit Length] and [Data Type]. Alarm settings have been completed.
-
Open the screen editor and set the Alarm part which will display the Alarm. From the [Parts (P)] menu, select [Alarm (A)], or click  and place the part on the screen.

-
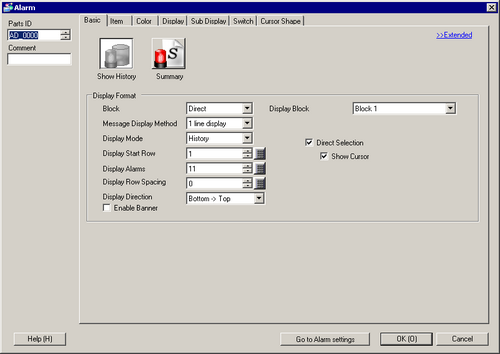
Double-click the placed Alarm. The Alarm dialog box appears.
-
For the alarm, select the Block and the Display Mode.
-
Set the [Display Start Row], [Display Alarms] and [Display Row Spacing].
-
On the [Item] tab, select the [Address] check box to set [Display Characters]. Select the [Address1], [Address2], and [Address3] check boxes.

-
As needed, use the [Color] tab, and [Display] tab options to change alarm message's number of display characters, text color, background color, font, and size. Click [OK].