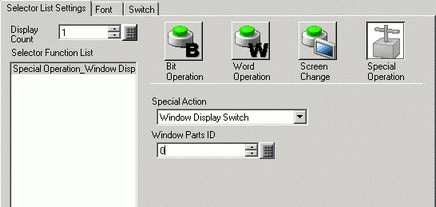
Special Action
Select the Special action.
Window Display Switch
This is the same as the Switch attached to a Window part which triggers the Window. Press the Switch and the designated Window displays. Press it again and the Window closes.
Alarm History Switch
This is the same as the Switch that is attached to the Alarm part. This creates a Switch to manage (Acknowledge/Move/Clear) the displayed Alarm History.
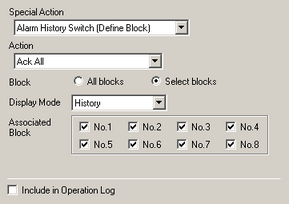
Alarm History Switch (Block)
Creates a switch that operates the alarm history (acknowledge and clear etc) by specified block unit.
Text Alarm Switch
This is the same as the Switch that is attached to the Text Alarm part. Creates a Switch to show the displayed Text Alarm's scroll or Sub Screen.
Historical Trend Graph Switch
This is the same as the Switch that is attached to the Historical Trend Graph. Creates a Switch to display and scroll through historical data.
Sampling Data Display Switch
This is the same as the Switch that is attached to the Sampling Data Display part. Creates a Switch to operate a Sampling Data Display.
Operation Lock
When multiple display units are connected to one PLC via GP-Viewer EX or Ethernet, and you start working on a display unit/GP-Viewer EX, operations from other display units/GP-Viewer EX become disabled. Therefore, you can create an operation switch to re-enable operations on the other display units/GP-Viewer EX.
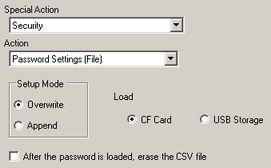
Security
Create an operation switch to change password during the online mode (communicating to the device/PLC).
File Item Switch
This is the same as the Switch that is attached to the Special Data Display [Filing]. Creates a Switch to transfer filing data, scroll through a Filing Display, etc.
File Manager Display Switch
This is the same as the Switch that is attached to the Special Data Display [File Manager]. Creates a Switch to display the File Manager on the screen.
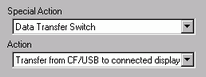
Data Transfer Switch
This is the same as the Switch that is attached to the Special Data Display [Data Transmission].
Creates a Switch to transfer CSV data, scroll through a Data Transfer Display, etc.
Switch for CSV Display
This is the same as the Switch that is attached to the Special Data Display [Show CSV].
Creates a Switch to scroll through a CSV Display or print CSV data.
Switch for Enhanced Recipe List
Creates a switch for transferring Enhanced Recipes, editing recipe labels, or other operations.
![]() Switch for Enhanced Recipe Lists
Switch for Enhanced Recipe Lists
Switch for Enhanced Recipe Data List
Creates a switch for saving edited Enhanced Recipes or other operations.
![]() Switch for Enhanced Recipe Data Lists
Switch for Enhanced Recipe Data Lists
Movie Player Switch
This is the same as the switch attached to the movie player. Create the switch to operate the screen for movie playback.
Start monitor switch
Create a switch to display the Device monitor and the Ladder monitor on the screen.
Application Trigger
Create a switch to directly specify and start the application executable file when using WinGP. You can specify settings such as the startup parameters and the watch on multiplex start.
Can be used when operating the IPC Series or SP5000 Open Box.
Exit WinGP
Create a switch to exit WinGP.
Can be used when operating the IPC Series or SP5000 Open Box.
Start Launcher
Create a switch to start the Launcher.
Can be used when operating the SP5000 Series Open Box.
Reset
Create a switch to reset the Display.
Offline
Create a switch to transfer to offline mode (no communication with the device/PLC) for the Display.
Remote PC Access Window Switch
This is the same as the switch attached to the Remote PC Access Window Display. Display the RPA Window Screens on the screen.
![]() 36.3 Display or Operate a Computer from the Display Unit
36.3 Display or Operate a Computer from the Display Unit
Transfer Device/PLC Data
Creates a switch for launching an executable which transfers device/PLC data stored on the display unit's external storage. Touch the switch to display the [Transfer Device/PLC Data] screen and transfer the ladder file on the external storage.
![]()
To prevent mistakes and unauthorized use, we recommend setting up security on screens that have switches.
![]() 23.1 Settings Menu
23.1 Settings Menu
Create the files for the Transfer Device/PLC Data operation with the Data Copy Tool. For the list of drivers that support the Data Copy Tool and information on transfer setup, please see the "GP-Pro EX Device/PLC Connection Manual".
Window Parts ID
Set the ID of the Window to display when the switch is touched. 0 to 3833 is the set up range.
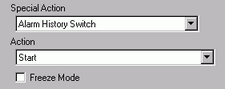
Action
Select the alarm history switch operation: [Start], [End], [Acknowledged], [Move], [Clear], [Sort], [Scroll], [Sub Display], [Alarm Number Acquisition Key], [Refine Search / Sort], or [Alarm Analysis].
Freeze Mode
When the [Action] is [Start], designate whether or not to use Freeze Mode (stops the Alarm display in the current state and does not perform updates).
Detail Action
If you select [Acknowledge], [Move], [Clear], [Sort], [Scroll], [Refine Search/Sort], or [Alarm Analysis] for the [Operation], you need to also select the details of the operation.
Acknowledge
Choose from [Acknowledged] or [Ack All].
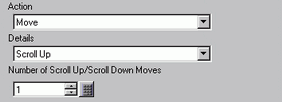
Move
Choose from [Move Upward], [Move Downward], [Scroll Up], or [Scroll Down].
Clear
Choose from [Clear], [Clear All], [Clear Recovered Alarm], [Clear Acknowledged Alarm], [Clear All Recovered Alarm], [Clear All Number of Occurrences Fields], [Clear Individual Number of Occurrences Fields], [Clear All Accumulated Time Field] or [Clear Individual Accumulated Time Field].
Sort
Select from [In Reverse Order of Trigger Date], [In Number of Occurrences Order], [In Descending Order of Accumulated Time], [Level & In Reverse Order of Trigger Date], [Level & In Descending Order of Number of Occurrences], [Alarm Registration Order], or [Reverse Order Display].
Scroll
Select either [Scroll Right] or [Scroll Left].
Refine Search/Sort
Choose from [Clear Search/Sort] or [Update Search/Sort].
Alarm Analysis
Choose from [Analyze (Trigger Time)], [Analyze (Acknowledged Time)], or [Analyze (Recovery Time)].
Number of Scroll Up/Scroll Down Moves
When [Detail Action] is [Scroll Up] or [Scroll Down], set the number of moves the Switch will scroll when pressed once. The setting range is from 1 to 768.
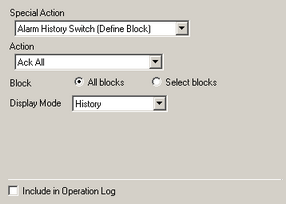
Action
Select the switch operation to operate the alarm history from [Ack All], [Clear All], [Clear All Recovered Alarms], and [Clear All Acknowledged Alarms].
Operate the alarm history for the associated blocks regardless of the displayed screen.
Block Designation
Select the block to operate the alarm history from [All blocks] or [Select blocks].
Display Mode
Select the display format for the alarm you want to display.
Associated Blocks
Displayed when [Select blocks] is selected for [Block].
Place a check mark in the associated blocks that operate the alarm history.
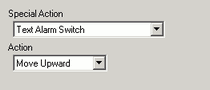
Action
Choose the action from [Move Upward], [Move Downward], [Scroll Up], [Scroll Down], [Sub Display], or [End].
Number of Scroll Up/Scroll Down Moves
When [Action] is [Scroll Up] or [Scroll Down], set the number of moves the Switch will scroll when pressed once. The setting range is from 1 to 512.
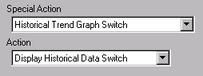
Action
Select the Display Historical Data switch operation for the Historical Trend Graph: [Display Historical Data Switch], [Scroll for Old Data], [Scroll for New Data], [Zoom Display], and [Zoom Out Display].
Samples to Scroll
When [Action] is [Scroll for the Old Data] or [Scroll for New Data], set the number of samples to scroll with one touch. The setting range is from 1 to 65535.
Use only in Display Historical Data
When [Action] is selected as [Zoom Display] or [Zoom Out Display], specify whether to use it only when displaying Historical Data.
Historical Trend Graph Parts ID
When [Action] is selected as [Zoom Display] or [Zoom Out Display], set the historical trend graph parts that reflect the display condition.
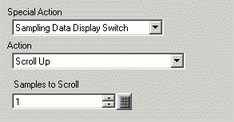
Action
Choose the [Action] of the switch for the Sampling Data Display operation, from either [Scroll Up], [Scroll Down], [Scroll Left], [Scroll Right], [Clear Search/Sort], or [Update Search/Sort].
Samples to Scroll
When selecting a scroll action, specify how much to scroll with each touch. The range is 1 to 65,535 for [Scroll Up] and [Scroll Down], and 1 to 514 for [Scroll Left] and [Scroll Right].
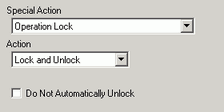
Action
Choose the action of operation lock switch from [Lock and Unlock], [Lock] or [Unlock].
Do not automatically unlock
When selecting, the lock does not automatically unlock even after the time set in [Time Out] in [Operation Lock Settings] in the Display Unit [Extended Settings] has passed. To release, set [Action] to [Lock and Unlock], or place a Special Switch for the [Unlock] operation.
![]()
If you are using a model that supports SD Cards, change the [CF] and [CF Card] to [SD] and [SD Card].
Action
Choose the action of the set password switch online: [Password Settings (Screen Input)], [Password Settings (File)], [Log In] or [Log Off].
Password Settings (Screen Input)
Displays the password change screen. From this screen, you can change the ID or the level password of the logged in user.
To change the password for users at the same security level or below, select the [Enable changes to users at current and lower security levels] check box.
Password Settings (File)
Change the password by reading password information that is saved in external storage in CSV file format.
Setting Mode
When [Set Password] is the defined [Action], select [Overwrite] or [Append].
Overwrite
Overwrite the password that was read-in to the existing passwords.
Append
Append the password that was read-in to the existing passwords.
Load
Choose where to load the password from: [CF Card] (or [SD Card]) or [USB Storage].
After reflecting the password, delete the CSV file.
After showing the password from the [Load] operation, specify whether to delete the CSV file.
Log Off Screen
When selecting [Log Off] as the [Action], choose the log off screen from [Start Screen], [Select Screen], or [No Screen Movement].
Screen
When using [Select Screen], specify the screen number to display when logging off.
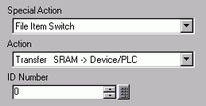
Action
Choose the action of the switch in the Special Data Display [Filing]: [Transfer from SRAM to Device/PLC], [Transfer from SRAM to Internal Device], [Transfer from Device/PLC to SRAM], [Transfer from Device/PLC to Internal Device], [Transfer from Internal Device to SRAM], [Transfer from Internal Device to Device/PLC], [Move Upward] or [Move Downward].
ID Number
Set the ID number of the Special Data Display [Filing] you want to operate with the Special Switch. The value can be from 0 to 255.
Number of Moves
When [Action] is [Move Upward] or [Move Downward], set the number of moves for one touch from 1 to 2,048.
![]()
If you are using a model that supports SD Cards, change the [CF] and [CF Card] to [SD] and [SD Card].
Action
Select the switch operation for the Special Data Display [Data Transmission]: [CF/USB to Device/PLC], [Transfer Device/PLC -> CF/USB], [Transfer SD/USB -> Device/PLC], [Transfer Device/PLC -> SD/USB]), [Scroll Up], [Scroll Down] or [CSV Data Display].
Samples to Scroll
When [Action] is [Scroll Up] or [Scroll Down], set the number of moves for one touch from 1 to 100.
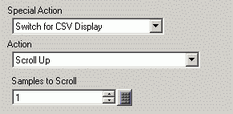
Action
You can set the Special Data Display [CSV Display] switch's action to [Scroll Up], [Scroll Down], [Scroll Left], [Scroll Right], [Print-All], or [Print-Display].
Samples to Scroll
When selecting [Scroll Up], [Scroll Down], [Scroll Left], or [Scroll Right], set the number of moves for one touch from 1 to 1000.
Switch for Enhanced Recipe Lists
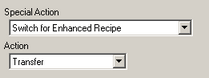
Action
Select the action for switches that operate on Enhanced Recipes.
Transfer
Transfers Enhanced Recipe data in the display unit to a device/PLC.
Receive
Loads data from a device/PLC to the display unit as a recipe.
Page Up
Changes the display to the previous page when the Enhanced Recipe list has multiple pages.
Page Down
Changes the display to the next page when the Enhanced Recipe list has multiple pages.
Edit Label
Allows you to edit the selected recipe label.
Copy Recipe
Copies the selected recipe.
![]()
The copy operation will not complete if you exceed the capacity of the screen area.
Delete Recipe
Deletes the selected recipe.
Clear Search/Sort
Clears Search/Sort when Refine Search/Sort is applied on recipe labels.
Number of Moves (Page Up/Down)
If you select [Page Up] or [Page Down] for the [Action], specify the amount of Page Up/Page Down movement with each touch. The setting range is from 1 to 65535.
Switch for Enhanced Recipe Data Lists
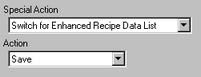
Action
Select the action for switches that operate on Enhanced Recipe Data Lists.
Save
Saves the data of modified element values.
Reload
Cancels changes and restores the original data.
Page Up
Changes the display to the previous page when the Enhanced Recipe Data List has multiple pages.
Page Down
Changes the display to the next page when the Enhanced Recipe Data List has multiple pages.
Number of Moves (Page Up/Down)
If you select [Page Up] or [Page Down] for the [Action], specify the amount of Page Up/Page Down movement with each touch. The setting range is from 1 to 65535.

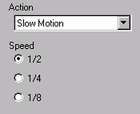
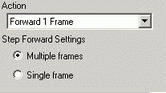
Action
Select the switch function for playing a movie with [Movie Player] from [Play], [Stop], [Pause], [Fast Forward], [Rewind], [Slow Motion], [Forward 1 Frame], [Back 1 Frame], [Change Movie], [Zoom], [Move], or [Video Display].
Speed
When selecting [Slow Motion] under [Action], specify the play speed from [x 1/2], [x 1/4] or [x 1/8].
Step Forward Settings
When the [Action] is set to [Forward 1 Frame], select [Multiple Frames] or [Single Frame]. This switch can be used only in the pause state.
Detail Action
When selecting [Change Movie] as the [Action], select [Next], [Previous], or [Specify Range].
Loop
When selecting [Next] or [Previous], specify whether to loop the file.
Specify Range
Specify the Index Number from 0 to 99 of the movie to play.
When selecting [Move] under [Action], select [Top], [Bottom], [Left], or [Right]. The following describes the range in which a movie can be moved at one time.
Direction |
When playing an SDX file |
When playing a video |
Landscape direction |
2 dot unit |
2 dot unit |
Portrait direction |
Normal size 2 dot unit 1/4 and 1/16 sizes 1 dot unit |
1 dot unit |
Detail Action
When selecting [Video] as the [Action], select [Video ON], [Video OFF], or [Video ON/OFF].
Action Mode
When selecting [Zoom] as the [Action], select [Direct] or [Indirect].
Display size
When selecting [Direct], select the display size from [Normal], [1/4], [1/ 16], or [Zoom].
The [Zoom] option zooms a movie in or out in this order: Normal -> 1/4 -> 1/16 -> 1/4 -> Normal, and so on, each time the switch is pressed. [Loop], when selected, zooms the movie in and out in the order of "Normal -> 1/4 -> 1/16 - Normal -> 1/4...".

Word Address
Designate an address to store the display size when [Indirect] is selected.
The display sizes are as follows.
0: Standard
1: 1/4
2: 1/16
3 to 0xFFFE: Reserved (no change)
0xFFFF: Normal (return to the main screen)
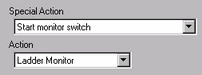
Action
Select from [Ladder monitor], [Ladder monitor (Cache)] or [Device monitor].
Ladder Monitor
Start the ladder monitor screen. The ladder is displayed after start and [Read]. The ladder is not displayed at start up.
Ladder Monitor (Cache)
Displays the previous ladder saved on the CF/SD card upon exiting.
Device Monitor
Start the Device monitor screen.
![]() 42.4 Monitoring the Value of Device Addresses (Device Monitor)
42.4 Monitoring the Value of Device Addresses (Device Monitor)
![]()
To use the Ladder monitor, you need the ladder monitor tool (sold separately) on your PLC. Refer to the ladder monitor operation manual in the ladder monitor CD-ROM.
Use the Start Application switch for starting the application by touch when using WinGP.
![]()
When using WinGP to start an external application, work with trusted applications only.
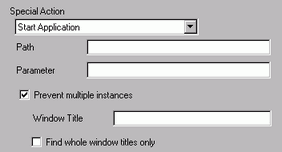
EXE path
Input the absolute path of the executable file (.exe) you want to start. You can input up to 255 characters.
Parameter
Input the argument of the executable file on start up. You can input up to 255 characters.
Prevent multiple instances
Set [Window Title] to watch multiple instances. You can input up to 63 characters.
If a window matching [Window Title] is found, the application does not start. In [Window Title], if there are no settings in this field, multiple starts are allowed.
Find whole window titles only
If a window matching the title specified in [Window Title] is found, the specified application does not start.
Exit WinGP.
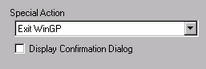
Display Confirmation Dialog Box
Display a confirmation dialog when exiting WinGP.