![]()
To perform the steps listed below, your environment must have an Internet connection available.
Server Computer Settings
When you use Windows Server 2003 as the server computer, you can use it as a terminal server and allow users to log in from multiple display units.
Terminal Server Setup
![]()
To perform the steps listed below, your environment must have an Internet connection available.
From the Windows task bar click
[Start] and then click [Control Panel].
Double-click [Add and Remove Programs] and open the Add or Remove Programs
dialog box.
Click [Add/Remove Windows Components] and select the [Terminal Server]
and [Terminal Server License] check boxes, and click [Next].

Installation starts.
When installation is complete, the
[Terminal Server License] appears and the program starts.
In the following dialog box, select a server name to register, right-click
the menu and then select [Activate Server].

![]()
During activation,
setup of the client license is also required. Please prepare
the following licenses in advance.
Windows Server Client Access License (CAL)
Microsoft Windows Server OPEN Business User CAL
Microsoft Windows Server OPEN Business Device CAL
Terminal Service Client Access License (TS CAL)
Microsoft Windows Server 2003 Terminal Service CAL OPEN Business User CAL
Microsoft Windows Server 2003 Terminal Service CAL OPEN Business Device CAL
Setup for OpenSSL
Download the latest "Win32OpenSSL"
to any location in the server computer from the following Web page:
http://www.shininglightpro.com/products/Win32OpenSSL.html
![]()
The URL is current as of July 2013. however the URL and contents of the site may change without notice.
Although operational checks have been done on "Win32OpenSSL", its operations are not guaranteed in all environments. Please test the "Win32OpenSSL" operations in the environment you are planning to use.
Double-click the downloaded file to begin installation. Specify any location for the installation.
Setup for rdp2vnc
Copy the "rdp2vnc.exe"
file from the following root folder on the installation CD and paste
it into a folder on the server computer.
\RPA\rdp2vnc\rdp2vnc.exe
Double-click "rdp2vnc.exe"
on the server computer to decompress the file and create a "rdp2vnc"
folder.
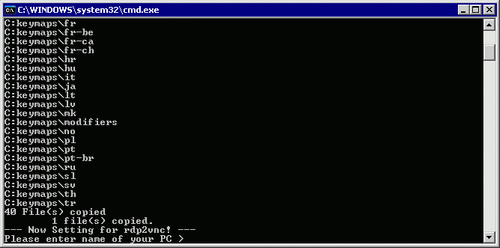
From the "rdp2vnc" folder, double-click "installXP.bat".
The Command prompt launches and installation begins.
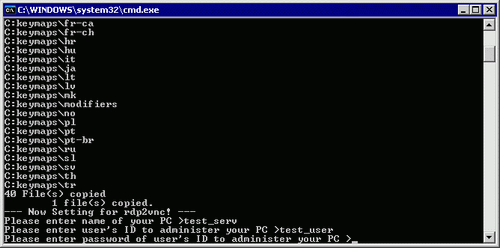
Enter the name of the server computer
you are installing the program on.
Enter a user name with administrative
privileges, and then enter the password.
![]()
If the password is empty, installation will end. Please set up a password.
When installation is complete, press the "Enter" key to exit the command prompt.
In the Control Panel, select [Administrative
Tools] and double-click [Services] to check whether "rdn2vnc
Server" is registered as a service.
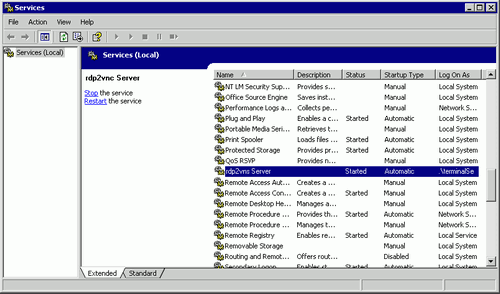
Right-click "rdn2vnc Server"
and select [Properties].
Click the [Recovery] tab, and select [Restart the Service] for the
following items: [First failure], [Next failure] and [Subsequent failure].

![]()
When [Restart the Service] is set, the service automatically restarts in the case of program errors of rdp2vnc for any reason, and it allows you to reconnect from the display unit.
In the Control Panel, double-click
[System].
In the System Properties dialog box, click the [Remote] tab and select
the [Allow users to connect remotely to this computer] check box.

For GP-Pro EX
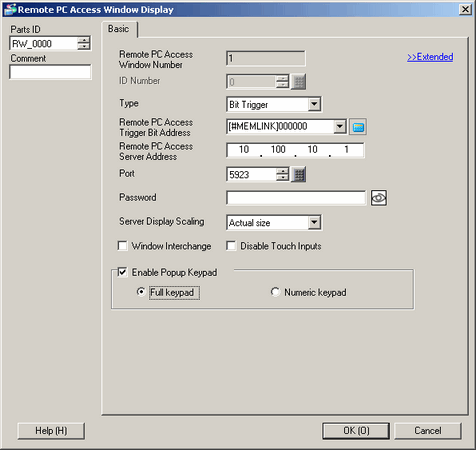
Double-click [Remote PC Access Window
Display] to display the dialog box settings.
For the [Remote PC Access Server Address], enter the IP address of
the server computer that rdp2vnc was set up for. Enter "5923"
for [Port Number] and leave the [Password] field blank.
![]()
Password authentication is not performed when connecting to rdp2vnc.
If you want to log in to the server from multiple displays, you can automate the log in process by clicking [>>Extended].
Select the [Automatically Log in
to Terminal Server] check box and define the [User Name] and [Password].

![]()
If you enter an incorrect User Name or Password, a server login failure message displays but the connection will not fail.
When using Automatic
Log in, set the application to display the login screen immediately
after connecting. Additionally, set a shortcut to display
the input boxes for the User Name [Alt+U] and Password [Alt+P].
If there are no login screens immediately after connecting,
unexpected behavior may occur.
For example, if your application does not go to a login screen
after connecting and the application is running, when the
shortcuts [Alt+U] and [Alt+P] are pressed, they run functions
allocated to them and fill out the User Name and Password.
Click [OK].
Transfer Projects to the Display Unit.